
Philip's Portfolio
Gameplay && AI && Systems || Unity && Unreal && OpenGL
Gameplay && AI && Systems || Unity && Unreal && OpenGL

Hi, I am Philip, a programmer graduated from Yrgo's Game Creator Programmer program. I had very limited programming skills before enrolling but it was an intense experience and after only two years I had learnt enough C# in Unity and C++ in Unreal 5 to make games in 2D and 3D. Straying off the curriculum, I also learnt enough low level C/C++ to create a slimmed down engine or renderer with OpenGL. To demonstrate my dedication to learning this wonderful art, I could point out that I had to balance school with both work and family. Did I mention it was intense?
The fruits of my labours are outlined in the portfolio section, the section you casually scrolled past to get to read about me. Technically I suppose everything on this site is all about me, so, in that sense you really can't go wrong!
Coding games has been a long nurtured dream that I abandoned long ago (until more recently, obviously) and so I have mostly done lots of other stuff, such as working as a quality assurance consultant, a brief stint doing economics for a logistics company, graduating from the University of Hull with a BA in PPE, and working as a bicycle courier in Gothenburg. For more detailed information, download my CV.
Other than committing myself to the art of creating games, I am a father, boardgamer, philosopher, test driver, beekeeper and trained killer. If we were working together we would have the best of times!
I didn't list gamer above because that kind of goes without saying. However, I suck at most games partly because I'm generally more interested in story or exploration and partly because I prefer playing as relaxation. Saying that, I have played computer games for a long time but some of my most treasured memories come from Sid Meier's Pirates, Wing Commander, Zelda (take your pick), GTA3 and Left4Dead. Having had less time to play the past ten years (yeah, something happened) I have become something of a Nintendo fan-boy, playing all those Zeldas and loving all (except for Tears of the Kingdom), the most excellent Pikmin games, Mario Kart (still think Double Dash nailed it), and am eagerly anticipating the opportunity to dig into the new Metroid Prime, which I am sure I will have the time to do any year now.
By the way, I also code in python. I have only very recently started to work on a portfolio for python as well.
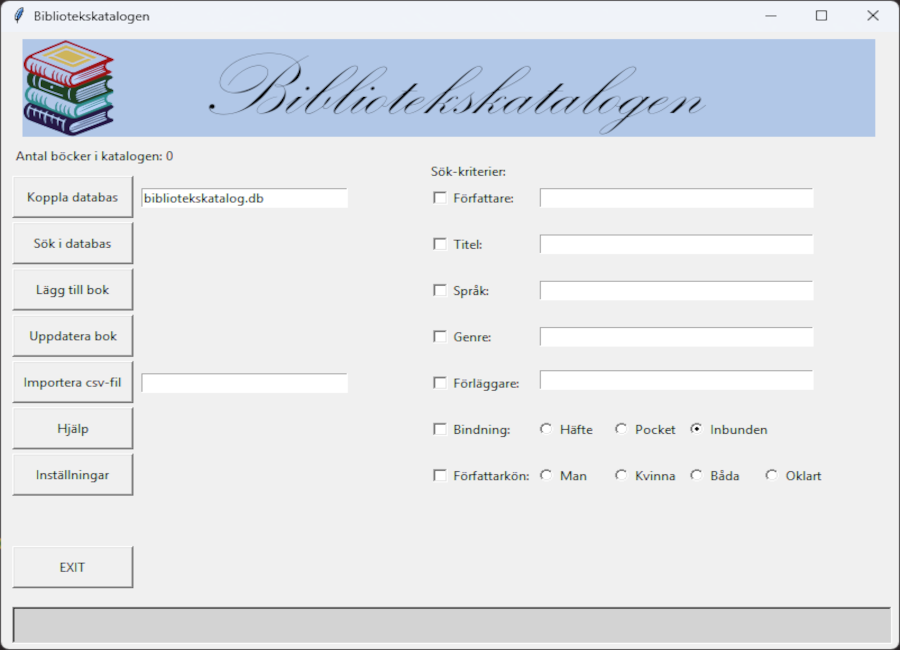
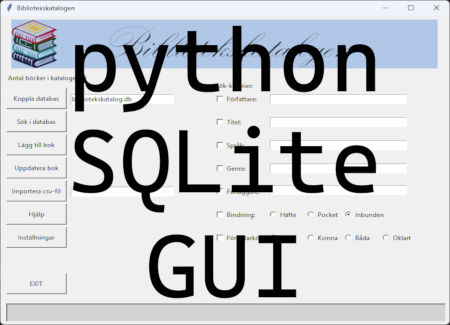
GUI for library database
An area where python really shines is in the making of small apps with graphical interfaces. So, considering how much effort went into creating a GUI in OpenGL, I decided to write an app for my library catalogue in python.

The idea behind the project was to convert an old excel-file containing all my books into an SQL database and be able to add more books to it and make it searchable. Existing frameworks in python make this quite an easy thing to do and I had a working GUI doing all these things within about six hours, even though it was the first time I tried my hand at tKinter. Then, of course, I had a bit of feature creep and some polish, taking at least as much time again.
I took advantage of the fact that SQL commands are incorporated as strings to make a dynamic search engine for my database (that sounds a bit more like I am trying to sell something than I intended):
def __init__(self):
        # READ SETTINGS
        with open(self.config_file, 'r') as settings:
            it = 0
            dbl = -1
            sf = -1
            sf_it = 0
            sf_start = False
            for line in settings:
                if line.strip() == "db-file:":
                    dbl = it + 1
                elif line.strip() == "search-formatting:":
                    sf = it + 1

                if dbl == it:
                    self.db_file = line.strip()
                elif sf == it:
                    sf_start = True
                    self.search_format[str(sf_it)] = int(line.strip())
                    sf_it += 1
                elif sf_start:
                    self.search_format[str(sf_it)] = int(line.strip())
                    sf_it += 1

                it += 1
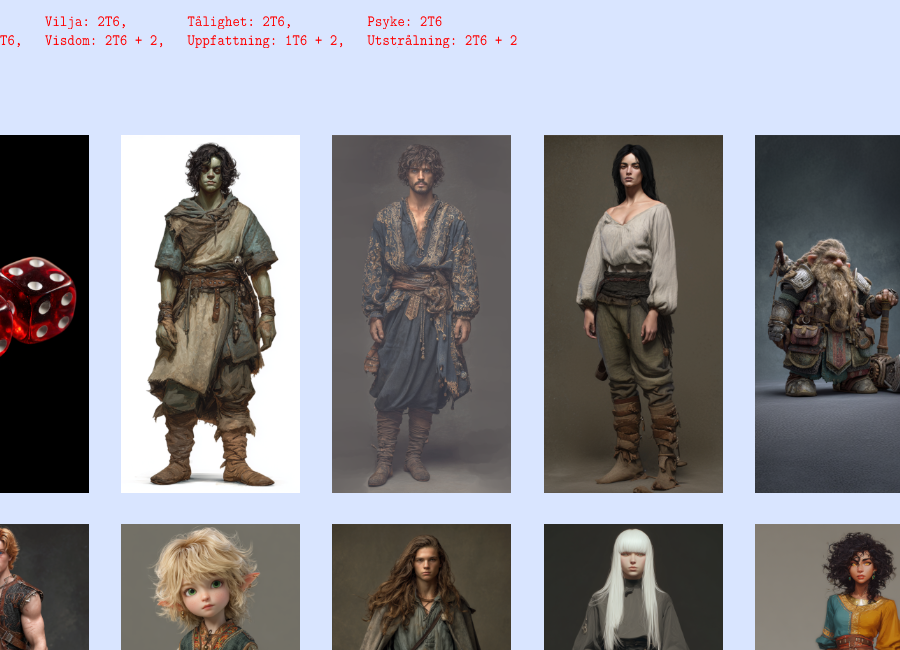
Character generator for Swedish pen-and-paper rpg Eon
Straight after examination, I was back to work. Unfortunately, not having found a programming related job it was my old job that beckoned. Nevertheless, I decided to apply myself to what I call “lunch time fun” which is to code for about 20-30 minutes instead of socializing with my colleagues (actually, they have been mildly curious about my projects so it’s been a bit of both). I figured it would have to be a small project or it would take years to finish. A friend of mine had requested a tool to generate characters for a pen-and-paper rpg called Eon and this seemed like a perfect opportunity to dabble with a GUI. You might be wondering about my work in progress and why I haven’t continued with that instead. If you do, then the short explanation is that I no longer have the time for such a large project, at least not if I want to see any results any time soon. So, that project is currently on ice.
I found some maps online for the rpg and decided to put them to use. So, the first thing that greets you is a big map of the most commonly played in area of Eon and that map is actually the button to start creating a character. Clearly, my reason is for the user to take the plunge into Eon.

It would have made sense to take the opportunity to learn everything about Dear Imgui but since I am still all about wanting to progress my own skills, I made my own buttons. I decided to start simple with just a rectangle with a texture and a shader that highlights that texture when the mouse cursor crosses a rectangular collider. Whenever the mouse button is clicked I check if any buttons are currently colliding with the cursor, and if so execute the appropriate functions. Thus, I had a simple On Hover and a simple On Click for each button.
Since making a graphical UI editor seemed a bit much for a small project, I knew I had to bake a lot of versatility into the button class, to make it easier for me to place everything correctly and getting the UX I wanted out of it. As a result, the button class has more overloads than you can shake a stick at! There are 11 functions to set size and position of the button as well as the collider. Here’s what the entire class looks like:
class button
{
public:
	typedef void (*action_ptr)();
	typedef void (*action_ptr_1p)(void* p1);
	typedef void (*action_ptr_2p)(void* p1, void* p2);
	typedef void (*action_ptr_3p)(void* p1, void* p2, void* p3);


	void init(uint16_t in_id, float in_layer);
	~button();
	void on_click();
	void set_action(action_ptr a);
	void set_action(action_ptr_1p a, void* p1);
	void set_action(action_ptr_2p a, void* p1, void* p2);
	void set_action(action_ptr_3p a, void* p1, void* p2, void* p3);
	void set_id(uint16_t in_id);
	void load_texture(const char* in_filename, uint16_t screen_width, uint16_t screen_height);
	void load_texture(const char* in_filename, float in_scale, uint16_t screen_width, uint16_t screen_height);
	void add_collider(double in_x, double in_y, double in_width, double in_height, button_collider* in_collider);
	void remove_colliders();
	void set_position(float in_x, float in_y);
	void set_position(float in_x, float in_y, float in_layer);
	void set_position(float in_x, float in_y, float in_layer, float in_width, float in_height);
	void set_collider(E_system command);
	void set_collider(double in_x, double in_y, double in_width, double in_height);
	void set_collider(double in_x, double in_y, double in_width, double in_height, button_collider* in_collider);
	void set_position_and_collider(float in_x, float in_y);
	void set_position_and_collider(float in_x_pos, float in_y_pos, E_system command);
	void set_position_and_collider(float in_x_pos, float in_y_pos, double in_x_coll, double in_y_coll, double in_width_coll, double in_height_coll);
	void set_layer(float in_layer);
	void set_size(float in_width, float in_height);
	void remove_button_from_array(std::vector<button*>& in_array);
	void toggle();
	const bool get_toggle();
	void set_toggle(bool in_toggle);
	void toggle_in_array(std::vector<button*>& in_array);
	glm::vec3 get_position();
	glm::vec2 get_size();
	bool toggled();
	bool collision(double in_x, double in_y, uint16_t screen_width, uint16_t screen_height);
	void bind(const uint32_t in_unit = 0);
	void draw();
	void unbind(const uint32_t in_unit = 0);


	void (*action)(void (*func), void*, void*) = 0;
	uint16_t button_id = 0;
	bool b_collided = false;

private:
	void load_buffer();

	struct button_position* position { 0 };
	struct button_collider* collider { 0 };
	std::vector<button_collider*> colliders;
	std::vector<vertex_button> vertices;
	uint32_t texture = 0;
	uint32_t vao = 0;
	uint32_t vbo = 0;
	bool b_toggled = false;

	void* arg_1 = 0;
	void* arg_2 = 0;
	void* arg_3 = 0;
};
If you had the stamina to read through that, you may have noticed that there is a function to set collider with an enum. This is because by design I chose that a button must always have a collider. However, there are times when you don’t want a collider, such as when an option attached to a button is not available. My solution then is to set the collider far off screen with 0 area. To make this perfectly clear, I made a macro that simply fills in rubbish coordinates, so that in the code it looks like this:
_state.button_01.set_collider(NO_COLLIDER);
But I wanted to be even clearer! When you scan through the macro section, you’re going to wonder what the one with some magic numbers actually does. So I made an enum with a label that also says NO_COLLIDER and then made button::set_collider functions to accept an enum and set the rubbish coordinates there, where you expect them to be set. All that is perhaps going further than necessary but I know how confusing it can get with macros so I’d rather be clearer than necessary.
Another rather important feature with buttons is for something to happen when you press them. If you are coming from other languages, you will be spoilt for choice, because in C/C++ there are no proper delegates available. So I decided to write my own action system using function pointers, void pointers and a lot of casting!
The action, or callback function, is set like this:
void button::set_action(action_ptr_3p a, void* p1, void* p2, void* p3)
{
	reinterpret_cast<void*&>(action) = a;
	arg_1 = p1;
	arg_2 = p2;
	arg_3 = p3;
}
and is used like this:
void button::on_click()
{
	if (action == 0)
	{
		std::cout << "Button was pressed but there was no action to take." << std::endl;
		return;
	}

	action(arg_1, arg_2, arg_3);
}
The button is defined in runtime:
_state.button_03.set_action(reinterpret_cast<button::action_ptr_1p>(&_folkslag_jargier), reinterpret_cast<E_jargisk_provins*>(E_jargisk_provins::MERUN));
or with a handy macro:
SET_BUTTON_A3(&_state.button_01, FÄRDER_ÄVENTYR, 1.f, left_margin, row, &_händelser, &färder_äventyr_text, &character.färder_äventyr, &character.händelseslag.färder_äventyr)
where the &färder_äventyr_text parameter is actually a nested callback function. I was actually pleasantly surprised that the compiler works everything out in on_click() regardless of how many arguments the callback function actually takes (as long as there are no more than my max, which is 3).
I also decided to get a bit stupid. The engines I have worked with create and destroy buttons on demand, meaning you tailor each to your needs and store that data in scripts attached to the buttons, and when the button has served its purpose you delete the lot. I figured it would be more performant to have a pool of buttons that are repurposed for each “scene”, both in terms of memory management and framerate. Obviously, it is ludicrous to chase slivers of performance for a tiny text-and-image tool but it was about the exercise rather than actual performance. All it really meant, though, was that I attached an ID to each button and put a lot of data in header files. When the scene changes, the buttons look for data in a different header file. For instance: when the character’s background is determined, two randomized choices appear based on what area the character lives in. With six different areas to choose from, there are more than 300 different backgrounds to select from, each with its own descriptive text to appear. All this text is in a header for backgrounds.

However, I soon realised that some choices along the way lead to different sub-choices, which was why I needed to be able to swap button ID on the fly. Some ethnicities, for example, prompt the user to select a home province for that ethnicity:

As can hopefully be seen from the gif above, I realised that with all the fancy textures on the buttons, there was limited screen space for text. So I made text part of the On Hover effect. Another thing I wanted was for the user to able to select province by choosing from a map of the country. While the textures are still rectangular, obviously the colliders needed a lot of work for a smooth experience. My solution was to, instead of making fancy polygon colliders, simply stack more rectangular colliders on each button until enough of the visible part was covered. It is certainly simpler to stick with rectangular colliders and while this could have been an opportunity to work with more advanced colliders, you really want a graphic editor to trim in polygon colliders and I had already taken a lot of time to place each province (almost) exactly right. So, for the sake of getting things done and staying sane, rectangular colliders it was. I should, perhaps, also reveal that I haven’t filled the buttons with colliders, but decided the user will have to work a little as well, at least for the time being and until I can get some user feedback.
There was one more thing, however: what if the user needs to go through several sub-choices based on their chosen ethnicity? Instead of having one choice at a time, I created a toggling system where you proceed when all sub-options have something highlighted.

Going into this project, I thought it would be a lot smaller than it’s turned out to be. There are simply so many sub-choices, each with their own needs for representation, and so much text that I’ve been bogged down with all sorts of challenges. A challenge that I set for myself before I started was to not use std::string anywhere in the project. With so much text, this has definitely made progress harder, but also means the program is way more memory efficient (yay!). I store all the text as vectors of char* and at first I started editing the length of each char* within the vectors to the length required by my GUI. But it takes a lot of time to make sure thousands of lines of text have the correct length and then you realise you want to change the layout. So I wrote a function that chops up each char* to several smaller char* of a specified length (and cursed myself for not writing it from the get go):
for (char* str : temp_array)
{
	array_length = static_cast<int>(strlen(str));
	array_delta = 0;
	int i = row_length;

	while (array_delta < array_length)
	{
		if (array_length < row_length)
		{
			for (int ch = 0; ch <= array_length; ch++)
				in_temp_array[number_strings][ch] = str[ch];
			in_temp_array[number_strings][array_length + 1] = '\0';
			number_strings++;
			break;
		}

		if (str[i] == ' ' || str[i] == '-')
		{
			memcpy(in_temp_array[number_strings], &str[array_delta], i - array_delta);
			in_temp_array[number_strings][i - array_delta + 1] = '\0';
			number_strings++;
			array_delta = i + 1;

			if (i + row_length < array_length)
				i += row_length;
			else
			{
				memcpy(in_temp_array[number_strings], &str[array_delta], array_length - array_delta);
				in_temp_array[number_strings][array_length - array_delta] = '\0';
				number_strings++;
				array_delta = i + 1;
				break;
			}
		}
		else if (i < 1)
		{
			std::cout << "Word longer than allowed row length. Check your strings." << std::endl;
			return;
		}
		else
		{
			i--;
		}
	}
}
The astute coder will realise that since I am using memcpy and not checking to see whether the resulting char** is out of bounds, this function can overwrite the memory explicitly allocated to it. In this scenario, this actually served my purpose because I have enough memory allocated on the heap to fill the screen but I need it split up between 8 different arrays for one particular case. Just, if you want to copy this code, you will need to add a bounds check.
In character creation, clearly the need for randomized numbers arises from time to time. I probably should have gone with the standard random function provided in C++ but you keep hearing about how all the standard randomizers are only pseudo random and you begin to wonder. I can’t take much credit for my random function either, since the hard part, i.e. the actual generator, is provided and I found a usage example on Stack Overflow that I mostly stuck to. All I really did was add an optional range. So, basically, I stole someone else’s code using yet someone else’s code:
uint32_t _random_int(int32_t in_min, int32_t in_max)
{
    std::random_device rd;
    std::mt19937::result_type seed = rd() ^ ((std::mt19937::result_type)std::chrono::duration_cast<std::chrono::seconds>(std::chrono::system_clock::now().time_since_epoch()).count() +
        (std::mt19937::result_type)std::chrono::duration_cast<std::chrono::microseconds>(std::chrono::high_resolution_clock::now().time_since_epoch()).count());

    std::mt19937 gen(seed);

    std::mt19937::result_type number = gen();

	if (in_max != in_min) // If they are equal, return the random number as is.
	{
        number = (number % (in_max - in_min + 1)) + in_min;
    }

    return number;
}
The reason why I think I should have gone with the standard solution is not so much that it would have saved time (I pinched the code anyway, so this only took me about half an hour of googling). Rather, it is because pseudo randomness has a more random feel to most of us. True random series will have clusters of the same numbers cropping up next to each other more often than most of us are prepared for. If you’re really interested, there is a wealth of information, not just about randomness but about this particular generator (Mersenne Twister) and its siblings, all within the std::random_device.
Show me a character and I’ll show you data! And boy is there a lot of it in an Eon character. I put all my structs in a single header (structs.h) and it’s more than 2000 lines long. That is in spite of having 12 different enums holding information as well (yes, I have all my enums in another header, enums.h) although to be fair most of those structs also contain functions to “clear” data and operator overloads. I have also tried a couple of different solutions to the problem of finding values in structs at runtime. The easiest way of all would have been to create std::maps (or std::pairs) of a lot of data but a problem is that any skill in Eon can have a bias for the character, meaning it can be either unusually easy or hard to learn. Therefore, each skill needs to store not just name and value but a modifier also. So, I chose to go with structs for the bulk of all data, with a basic skill holding an int value and two bools. So, getters and setters! In one case I went with a separate vector storing which abilities already have a value above 0 (this for abilities that are only meant to receive a value once) and for another case I wrote a function using pointer arithmetic:
uint16_t get_value(int field)
{
	if ((field * sizeof(uint16_t)) > (sizeof(*this)))
		std::cout << "WARNING! Out of range of struct!" << std::endl;

	uint16_t* value = reinterpret_cast<uint16_t*>(&this[0]);
	return *(value + field);
}

void set_value(int field, uint16_t new_value)
{
	if ((field * sizeof(uint16_t)) > (sizeof(*this)))
		{
			std::cout << "WARNING! Out of range of struct!" << std::endl;
			return;
		}

	uint16_t* value = reinterpret_cast<uint16_t*>(&this[0]);
	*(value + field) = new_value;
}
I have seen cases, and indeed many recommendations, where programmers make templates that do this instead. The trouble with pointer arithmetic is that it only works for one data type at a time and it becomes useless if there is padding in the struct. As a result, I consider a template too far removed to be used safely and prefer to put the function inside the struct, even if it means copying the exact same function into every struct, where it is easy to see whether it is workable or not. I decided to not throw any exceptions if the user goes out of range but instead just write a warning. Writing out of range is typically fairly safe as well but here I return without setting a value.
The most complex section of the character creator was the skills section. The challenge was to give the user access to all 170 different skills at the same time with the possibility to raise skill values as well as regressing them, running several different skill point pools simultaneously as well as considering that some skills could have picked up points bonuses along the way. I also decided to present the user with a more or less complete roster of attributes to paint a fuller picture of what the character was like at this stage.

So, as you can hopefully see I went with toggle buttons along the top for each skills category so I wouldn’t have to put too many buttons on screen at any given time. There are nearly 300 buttons in this section so it would have been really difficult to fit them all in there at the same time.
At some point, I noticed that my standard button (the green blob in a white square) colours obscured the toggling effect. That is, it was hard to see which button was toggled. So I wrote some code to swap the texture when toggled and added persistent scale to the buttons. This is an example of “why didn’t I do this straight away?”. I thought about it as soon as I realised I wanted toggles but reasoned that it would take more time and effort than just adding some brightness in the shader. To be fair, those first toggle buttons all had different textures so I would have had to make a lot more art as well as lists with what texture to swap with which. At any rate, compare the clarity between texture swap and added brightness!

Check back for more later!
So, nornware was happy with the Mesh-to-Image program and with two months left of my internship I was basically allowed to pick my own project, with the goal of trying to pass myself off as employable. At the time of writing this, I have only had one week of development, so it is still early days. But what I have done is to create a Blinn-Phong model of lighting with shadowmapping for realtime shadows. The shadow edges are still sharp and pixelated and since I’m guessing it would take me at least another week to learn how to do PCSS, they might stay this way.
Light straight on:

Light coming from the left:

Harsh shadows with a small amount of peter panning:

Gif:

UPDATE:

So, it doesn’t actually look like there’s any difference from before, in fact: it looks worse from before! But everything has been refactored, partly because I wanted to restructure a few things and partly because there’s a lot to learn from doing the same thing differently. I have done a lot of work on my gltf-loader and the models are now gltf-files as opposed to wavefront objects in the previous iteration. I also went more low-level with uniform handling. Before I used the same technique that I see examples of wherever OpenGL is displayed: all uniforms are stored in a map. However, this means that for every uniform you add one function call and an iteration of string comparison with your map. I’m running a very simple scene, requiring only 8 uniforms whenever I change shaders and 5 uniforms for every draw call (not counting the shadow pass) but this still adds up, even if I continue to keep it super simple and only use two different shaders (static and animated) and run a hundred draw calls. I’m sure a lot of magic has gone into std::map but 516 iterations every frame is going to take a toll. And what about if you want nicer visuals? Even smaller games might have up to 20-30 shaders per scene and over a thousand draw calls. Consider too, that the more uniforms you have, the longer it will take to iterate through the map.
Instead, I store the uniform indexes as const uints. It becomes an ugly large block of code just after shader compilation but that’s alright. I have inlined all my shaders into a header file as well, instead of loading external text files. That has nothing to do with performance, obviously, but a wish to minimize dependencies as well as to avoid clutter in the file structure.
I got a new model from Mixamo and that is the reason shadows look way worse now: the geometry around the chest area causes a lot of self shadowing. I upped the bias to combat this until peter panning is evident and self shadowing is still visible, which is what can be seen here:


The self shadowing can be solved with a number of different techniques (sloped bias might be enough) but my current priority is elsewhere.
Apart from all this, you might be wondering about the invisible mesh. That has been a real time sink and there’s literally nothing to show for it yet but hopefully there will be soon. A lot of time and energy has been spent on my upcoming graduation as well to be honest. But that’s an excuse for another time!
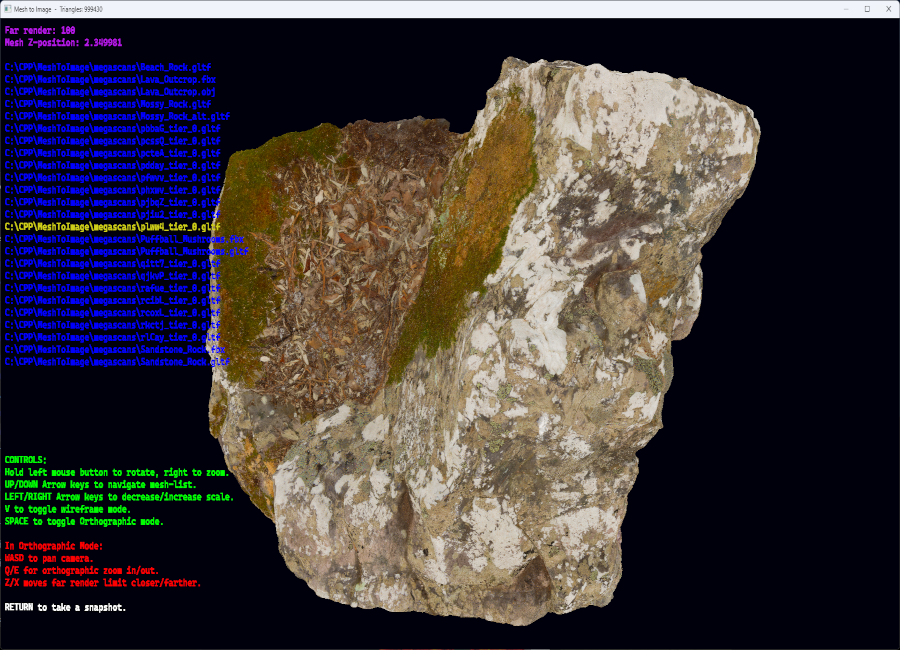
Creating terrain out of hi-res meshes
So, it was time to make the specified terrain creator. I repurposed some of the code from the previous attempt and decided to use the very excellent STB lib by Sean Barrett because there was no way I was going to spend all the time to write my own loaders for .png or .jpg and I really couldn’t expect the user to convert all textures to .tga. I did, however, write my own loaders for .obj, .fbx (admittedly using the fbx sdk) and .gltf meshes. To parse the json “header” of .gltf I included the also excellent json.hpp by Niels Lohmann. Why? Partly because I knew I could and it would be a good learning experience and partly because I wanted the added portability: smaller file size and fewer dependencies. This was also something that low level wizard Johno of nornware respected and encouraged.
Creating an array of vertices from mesh data is typically straight forward. However, I did groan when I realised that the gltf-format supported data embedded as a base64 encoded string. Incidentally, this is why you should only use .gltfs with embedded data if running webGL (or another web graphics API): load time and performance takes a definite hit from decoding the data. However daunting I initially found the prospect of writing a decoder, I was surprised when my first attempt just worked. Partly, this stemmed from not having copied someone else’s decoder: I had to look up what base64 entailed which detailed some of the necessary steps (such as what characters are included and in what order) but otherwise I just wrote what I figured should be how it works.
const char b64table[64] = { 'A','B','C','D','E','F','G','H','I','J','K','L','M','N','O','P','Q',
				'R','S','T','U','V','W','X','Y','Z','a','b','c','d','e','f','g','h',
				'i','j','k','l','m','n','o','p','q','r','s','t','u','v','w','x','y',
				'z','0','1','2','3','4','5','6','7','8','9','+','/' };

uint32_t start = static_cast<uint32_t>(uri.find("base64,") + 7);
uri = uri.substr(start);				// Assuming encoding will always be an octet stream.

int padding = uri.length() % 4;				// This should not be necessary but is a safeguard.
if (padding > 0)
{
	for (int i = 0; i < padding; i++)
		uri.append(padding, 'A');
}

for (int i = 0; i < uri.length(); i += 4)
{
	std::string tempString = uri.substr(i, 4);
	unsigned char uriSub[4];
	std::copy(tempString.begin(), tempString.end(), uriSub);
	unsigned char from64[4];

	for (int c = 0; c < 4; c++)
	{
		int idx = 0;
		for (char x : b64table)
		{
			if (uriSub[c] == x)
			{
				from64[c] = (char)idx;
				break;
			}
			idx++;
		}
	}

	unsigned char byteTriplet[3];
	byteTriplet[0] = (from64[0] << 2) + (from64[1] >> 4);
	byteTriplet[1] = (from64[1] << 4) + (from64[2] >> 2);
	byteTriplet[2] = (from64[2] << 6) + from64[3];
	binData.push_back(byteTriplet[0]);
	binData.push_back(byteTriplet[1]);
	binData.push_back(byteTriplet[2]);
}
So, I could load the types of meshes I wanted with the types of textures I wanted and stick them in front of the camera. But, rather fortuitously, I had accidentally clamped the camera to 90 degrees for the pitch which caused severe gimbal lock. The camera code was something I had got from a tutorial, and I have seen very slight variations of it across the web (searching for arcball camera). Now, that I was forced to revisit the code I immediately started to question it.
void MoveCamera(float dYaw, float dPitch)
{
	dPitch = glm::clamp(dPitch, -89.f, 89.f);
	yawRad = glm::radians(dYaw);
	pitchRad = glm::radians(dPitch);

	camPosition.x = subjectPos.x + camRadius * cosf(pitchRad) * sinf(yawRad);
	camPosition.y = subjectPos.y + camRadius * sinf(pitchRad);
	camPosition.z = subjectPos.z + camRadius * cosf(pitchRad) * cosf(yawRad);

	model = glm::translate(model, subjectPos);
	view = glm::lookAt(camPosition, subjectPos, camUp);
	projection = glm::perspective(glm::radians(45.f), (float)mainWindowWidth /
						 	(float)mainWindowHeight, 0.1f, 100.f);
}
The code above converts degrees to radians before rotating the world around the camera. For this reason, the pitch needs to be clamped or the mesh suddenly flips as you pass cos 90 during camera movement. First off, I realised it is unnecessary to use degrees in the first place, and secondly I figured that if I rotate the mesh instead, there is no need to clamp the pitch, plus the math becomes much more intuitive.
static void __camera_projection(glm::mat4& model, glm::mat4& view, glm::mat4& projection)
{
	model = glm::rotate(model, __state.subjectRotation.y * 1.5f, glm::vec3(0.f, 1.f, 0.f));
	const float xRot = cosf(__state.subjectRotation.y * 1.5f);
	const float zRot = sinf(__state.subjectRotation.y * 1.5f);
	model = glm::rotate(model, __state.subjectRotation.x * 1.5f, glm::vec3(xRot, 0.f, zRot));

	view = glm::lookAt(__state.camPosition, __state.subjectPosition + __state.subjectOffset,
				 __state.camUp);

	const float ASPECT_RATIO = static_cast<float>(__state.mainWindowHeight) /
					 static_cast<float>(__state.mainWindowWidth);

	projection = glm::perspective(glm::radians(45.f), (1.f / ASPECT_RATIO), 0.01f, 100.f);
}
The next step was to retrieve rgb and y values from the screen. A quick search gave the answer immediately: OpenGL has built-in functions for this and so it proved the easiest piece of the entire project to implement:
float* capturedColor = new float[in_width * in_height * 3];
float* capturedDepth = new float[in_width * in_height];
glReadPixels(0, 0, in_width, in_height, GL_RGB, GL_FLOAT, capturedColor);
glReadPixels(0, 0, in_width, in_height, GL_DEPTH_COMPONENT, GL_FLOAT, capturedDepth);
Since SBT has no real save functions (that’s how Sean Barrett wants it) I wrote my own, saving rgb as .tga and depth as .pgm. Pgm is a rather obscure format and it produces eye watering size on disk but it does support 16-bit grayscale and can be loaded by Photoshop and Gimp, which were the main objectives.
Now I had a working prototype, run from the command line, that did everything it was supposed to do. However, starting up the program with arguments for files every time you want to load a new one quickly gets tedious, especially when textures are in different folders from the meshes. So it was time to add a couple of features: scanning for mesh files, finding their textures, and displaying the results as text in the editor. Thankfully, std::filesystem turned the file scanning into a doddle. With gltfs, there are file paths in the json and so I could use those to retrieve the texture I wanted. For fbx and obj I just had to assume the texture would be in the same dir as the mesh and that its filename would contain the mesh filename.
Text is a different matter. I read a description of how it is usually done: “Draw a quad for each letter and put a texture featuring the correct letter on it.” and I figured that was something I should be able to do. For me, this has been a defining moment in my progress to become a real programmer. No tutorials, only this description, and having worked with data arrays for weeks, I saw a way of accomplishing it. First, I created the texture, taking an embarrassing amount of time to try different fonts in different sizes (in my defence, I didn’t know beforehand which ones were monospaced).

I then created a struct for the uv-coordinates and a map (that’s a dictionary for you C# coders out there) with the corresponding chars:
void GetCascadiaMap(std::map<char, BMuv> &bmuv)
{
	bmuv.clear();
	int asciiValue = 32;
	int tableWidth = 32;
	int tableHeight = 3;
	for (int i = 0; i < 3; i++)
	{
		for (int j = 0; j < 32; j++)
		{
			char c = char(asciiValue);
			BMuv tempbmuv;
			tempbmuv.topLeftUV = { static_cast<float>(j) / tableWidth ,
						static_cast<float>(i) / tableHeight };
			tempbmuv.topRightUV = { static_cast<float>(j + 1) / tableWidth ,
						 static_cast<float>(i) / tableHeight };
			tempbmuv.bottomLeftUV = { static_cast<float>(j) / tableWidth ,
						 static_cast<float>(i + 1) / tableHeight };
			tempbmuv.bottomRightUV = { static_cast<float>(j + 1) / tableWidth ,
						 static_cast<float>(i + 1) / tableHeight };

			bmuv.insert({ c, tempbmuv });

			asciiValue++;
		}
	}
}
which in turn was used to map the correct letters to the quads:
const size_t TEXTLENGTH = std::strlen(text);
vertices.clear();
vertices.resize(TEXTLENGTH * 4);
const float quadWidth = 20.f / screenWidth;
const float quadHeight = 36.f / screenHeight;
const float zValue = 0.01f;

int pos_itr = 0;
int v_itr = 0;
for (int i = 0; i < TEXTLENGTH; i++)
{
	char c = text[i];

	if (static_cast<int>(c) < 32 || static_cast<int>(c) > 126)
		c = '#';

	const float lposx = pos_itr * quadWidth;
	const float rposx = (pos_itr + 1) * quadWidth;
	const float tposy = quadHeight;
	const float bposy = 0.f;
	const BMuv charUV = textmap.at(c);
	VertexText* v = vertices.data() + v_itr;

	v->position = { lposx, tposy, zValue };
	v->texCoords = charUV.topLeftUV;
	v->colour = colour;
	v++;

	v->position = { rposx, tposy, zValue };
	v->texCoords = charUV.topRightUV;
	v->colour = colour;
	v++;

	v->position = { rposx, bposy, zValue };
	v->texCoords = charUV.bottomRightUV;
	v->colour = colour;
	v++;

	v->position = { lposx, bposy, zValue };
	v->texCoords = charUV.bottomLeftUV;
	v->colour = colour;
	v++;

	pos_itr++;
	v_itr += 4;
}
Finally, a little gratiuitously, I created a macro
// Requires textbuffer and textmap to be named as such. Expects a variable as second argument.
#define WRITE_VAR(text, v, row, colour)	{ glUniform1i(UNIFORM_LINE, row);\
					snprintf(textbuffer, BUFFER_SIZE, text, v);\
					textline.WriteLine(textbuffer, textmap, ETextColour:: colour); }
So that I could create text in the while-loop like this:
WRITE_VAR("Far render: %f", __state.orthoFar, 0, RED)
And it all just worked.

There was just one more thing. I have mentioned a couple of times now how I wanted the program to be portable and without dependencies and yet now I had texture with characters to be able to write text in the editor. So, obviously I was going to inline it into an array! Before I had time to do it, Johno discovered and lamented the same thing, so I told him I was going to inline it to which there was hearty approval.
The good thing about text is that you only really need the alpha and you only need it as on or off, meaning I could reduce each pixel to a single bit. I wrote a program to load the texture and encode 8 pixels per byte before printing in the form of an array to a text file. Actually, I wrote a duplicate in binary form to a separate file for debugging purposes as well.
std::vector<uint8_t> alpha;
for (int32_t i = 3; i < image_size; i += 4)
{
	alpha.push_back(image_data[i]);
}
std::ofstream testfile(".\\bitslayout.txt");
if (testfile.is_open())
{
	int32_t tick = 1;
	for (int32_t i = 0; i < alpha.size(); i++)
	{
		testfile << static_cast<int>(alpha[i] / 255);
		if (tick == 8)
		{
			testfile << ", ";
			tick = 0;
		}
		tick++;
	}
	testfile.close();
}
else
	std::cout << "Failed to create bitslayout.txt" << std::endl;

std::ofstream outfile(".\\array.txt");
if (outfile.is_open())
{
	int tick = 1;
	for (int32_t i = 0; i < alpha.size(); i += 8)
	{
		uint8_t byte = 0;
		uint8_t mask =	(alpha[i + 7] / 255	<< 0) |
				(alpha[i + 6] / 255	<< 1) |
				(alpha[i + 5] / 255	<< 2) |
				(alpha[i + 4] / 255	<< 3) |
				(alpha[i + 3] / 255	<< 4) |
				(alpha[i + 2] / 255	<< 5) |
				(alpha[i + 1] / 255	<< 6) |
				(alpha[i]     / 255	<< 7);
		byte = byte | mask;

		outfile << static_cast<int>(byte) << ", ";
	}
	outfile.close();
}
else
	std::cout << "Failed to create array.txt" << std::endl;
Then all I had to do was delete the last comma, copy the text file into an array and write a function that decodes it.
uint8_t* CascadiaData()
{
	for (int32_t i = 0; i < cascadia_elements; i++)
	{
		for (int32_t a = 0; a < 8; a++)
		{
			for (int32_t rgb = 0; rgb < 3; rgb++)
				textdata[(i * 32) + (a * 4) + rgb] = 255;

			uint8_t value = cascadiadata[i] << a;
			textdata[(i * 32) + (a * 4) + 3] = 255 * (value >> 7);
		}
	}

	return &textdata[0];
}
This project really made me feel like low level programming is all about structuring your for-loops but if that is so, then that is ok.
This project is available on https://github.com/B0realian/MeshToImage
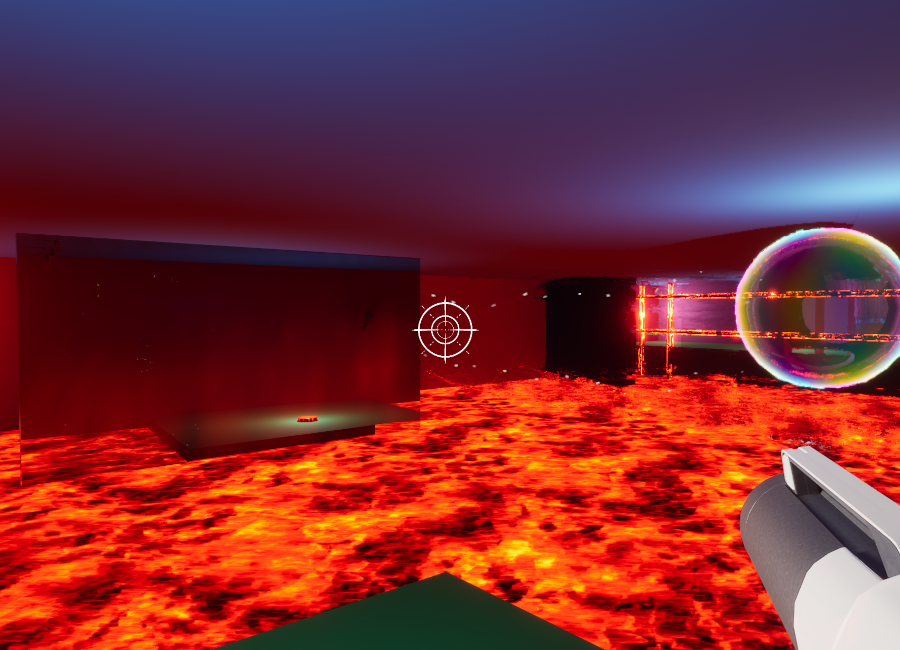
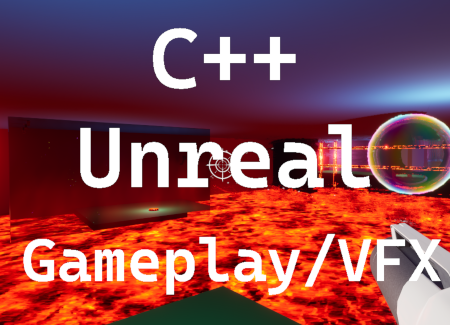
Portal-like floor-is-lava puzzle-game
A month and a half into my internship I had a craving for games creation and signed up for GGJ-25. I teamed up with a couple of class mates and we were joined at the jam by a professional dev. Unfortunately for him (and/or us) we had decided to make the game in UE whereas he only had experience with Unity but he turned out to be a great level designer and this way it was less stressful for him I suppose.
Something that turned out to later cause half an hour of panic was that my class mates wanted to use blueprints while I felt much more comfortable with C++. Naturally, I told them it was no problem since everything is eventually turned into a BP-class anyway. That promise was what made me stressed, I suppose, since naturally we discovered it could be a problem.
This year’s theme was “Bubbles” and while brainstorming I mentioned that a bubble can refer to a self-contained universe and what if we could base the game on a mechanic that lets the player travel between realms? This idea was soon mutated into something much more akin to Portal, but where you shoot bubbles to which you can teleport.
Since I was more experienced with Niagara, I ended up doing most of the FX (not that there was much of it), such as the air flow effect from the fans.


I started off trying to use sprites, which of course did not work at all. It is probably obvious to anyone who has ever wanted to create something similar in Niagara, but Ribbons is what gets the job done. So, in essence, a bunch of ribbons with transparency, a lot of curl noise and refraction and there it is. Since it was a little hard to make out what direction the ribbons travel in, I also added some sprites as dust particles.
Clearly, we also needed bubbles, which material became a joint creation between me and one of my class mates. He did the hard part, the shifting colour, while I was busy with something else, and I merely added fresnelled refraction. My team mates wanted me to up the index to ludicrous level, so I did.

And then, of course, we needed a burst effect. I spent a little too much time trying to get the colours to match the feeling of the bubble and in the end the photo realism of the bubble didn’t match the low-poly pastel burst anyway. That’s game jam art I guess.

Next up, we needed a button to interact with the various obstacles in the game, so I quickly made a messy mesh in Blender and slapped some code to it. We wanted a do-anything button to make level editing easier, so I accomodated all our objects and let the level designer check whatever target he wanted in the editor.
void AFloorButton::BeginPlay()
{
	Super::BeginPlay();
	if (bOverlappingNotHitting)
	{
		Collider->OnComponentBeginOverlap.AddDynamic(this, &AFloorButton::OnOverlap);
		Collider->OnComponentEndOverlap.AddDynamic(this, &AFloorButton::OnOverlapEnd);
	}
	else
		MainMesh->OnComponentHit.AddDynamic(this, &AFloorButton::OnHit);
	Collider->SetGenerateOverlapEvents(bOverlappingNotHitting);

	StartingPosition = FVector(GetActorLocation());
	FullyPressedPosition = StartingPosition;
	FullyPressedPosition.Z -= 10.f;
}

void AFloorButton::FindTarget(bool bOverlapping)
{
	if (AudioComponent && !AudioComponent->IsPlaying())
	{
		AudioComponent->SetSound(PressButtonSound);
		AudioComponent->Play(0.f);
	}

	switch (ButtonTarget)
	{
		case ETarget::S_Portal:
			SpawnPortal();
			break;
		case ETarget::S_Lasers:
			ToggleLasers();
			if (!bOverlapping)
				GetWorld()->GetTimerManager().SetTimer(UnpressTime, this, &AFloorButton::Unpress, 1.f, false);
			break;
		case ETarget::S_Fans:
			ToggleFans();
			if (!bOverlapping)
				GetWorld()->GetTimerManager().SetTimer(UnpressTime, this, &AFloorButton::Unpress, 1.f, false);
			break;
		default:
			break;
	}
}
This was my only programming contribution and it very nearly didn’t survive when we realised that none of us had a clue how to connect a cpp with pure BP-classes. After some frantic searching through the documentation (all while my team mates figured it would be better if they scripted the class in blueprints instead) I found the magic bullet:
UFUNCTION(BlueprintImplementableEvent) void ToggleLasers();
UFUNCTION(BlueprintImplementableEvent) void ToggleFans();
Marking the functions as BP implementable meant we could add them to the Event Graph of the BP, thus running both script and code at the same time.
The game is currently available for download on
https://globalgamejam.org/games/2025/telebuddies-0-1
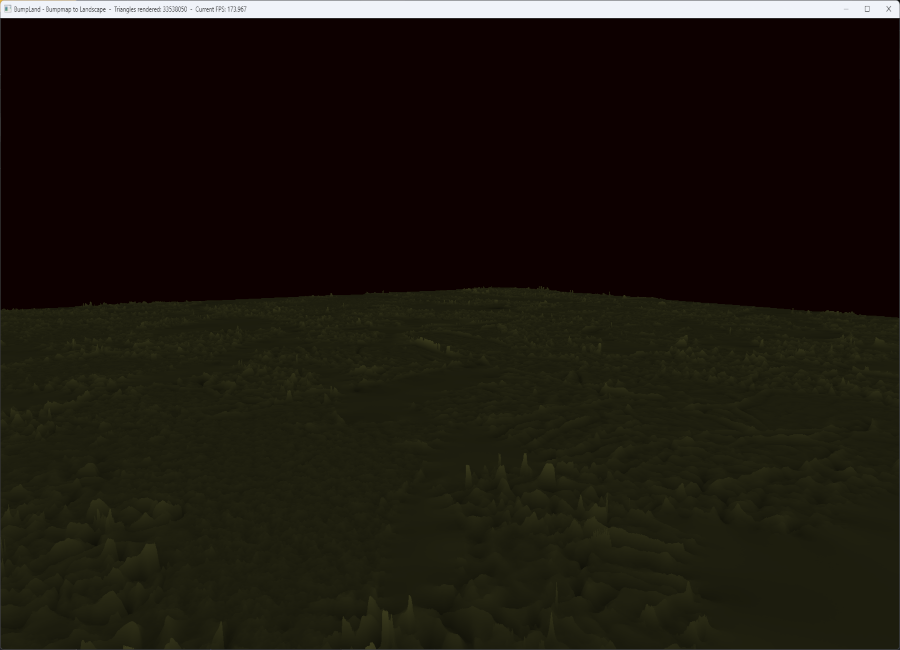
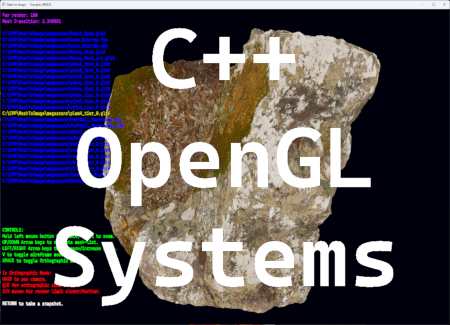
Creating terrain out of hi-res textures
Having started my internship with Nornware, I was given the task of creating a tool to create terrain out of megascans-files. The idea was to load a mesh and be able to take snapshots from different angles, saving colour and depth to file to be able to use as terrain for levels.
After spending a couple of weeks improving my standard C++ (I had only programmed C++ within UE up to this point) I started to learn the OpenGL API and soon had a prototype for a terrain maker up and running. However, I decided to take a shortcut when I realised there was a bumpmap with every megascans file, so instead of loading a mesh, I used the bumpmap as heightmap and created a mesh. Since the textures in megascans are high resolution, the file was 4K and produced a mesh with a whopping 35 million triangles.
While I thought I had been ever so clever, this wasn’t what had been asked for. So, I quickly abandoned the project and started a new one in which I adhered to the specification exactly.
At any rate, I did find and look at an example of using heightmaps but decided to go my own route. I also decided to use an average of rgb brightness to decide height, meaning any texture works quite well.
void Terrabumper::Terraform(const std::vector<unsigned char> &data, int stride)
{
  int rowLength = imageWidth * stride;
  float halfWidth = imageWidth / 2.f;
  float doubleWidth = imageWidth * 2.f;
  int x = 0;
  int y = 0;
  int z = 0;
  vertices.reserve(imageWidth * imageHeight * sizeof(float) * 3);
  vertexIndex.reserve((imageWidth - 1) * (imageHeight - 1) * 6 * sizeof(unsigned int));

  for (int i = 0; i < (rowLength * imageHeight); i += rowLength)
  {
    for (int z = 0; z < rowLength; z += stride)
	 {
	   float average = ((float)data[z + i] + (float)data[z + i + 1] + (float)data[z + i + 2]) / 3;
		 vertices.push_back((x - halfWidth) / imageWidth);
		 vertices.push_back(average * heightScale);
		 vertices.push_back((y - halfWidth) / imageWidth);
		 x++;
	 }
	 x = 0;
	 y++;
  }

  for (int i = 0; i < (imageHeight - 1); i++)
  {
    for (int j = 0; j < (imageWidth - 1); j++)
    {
      vertexIndex.push_back(j + (i * imageWidth));
      vertexIndex.push_back(j + 1 + (i * imageWidth));
	    vertexIndex.push_back(j + imageWidth + (i * imageWidth));
	    vertexIndex.push_back(j + 1 + (i * imageWidth));
	    vertexIndex.push_back(j + imageWidth + (i * imageWidth));
      vertexIndex.push_back(j + imageWidth + 1 + (i * imageWidth));
	  }
  }
  triangles = vertexIndex.size() / 3;
}
I should perhaps add that I wrote the shader to make the mesh brighter the greater its height.
#version 330 core

in float height;
uniform float invHS;
out vec4 frag_color;

void main()
{
   float rx = height * invHS;
   float gx = height * invHS;
   float bx = height * invHS * 0.5f;
   frag_color = vec4(rx, gx, bx, 1.f);
};


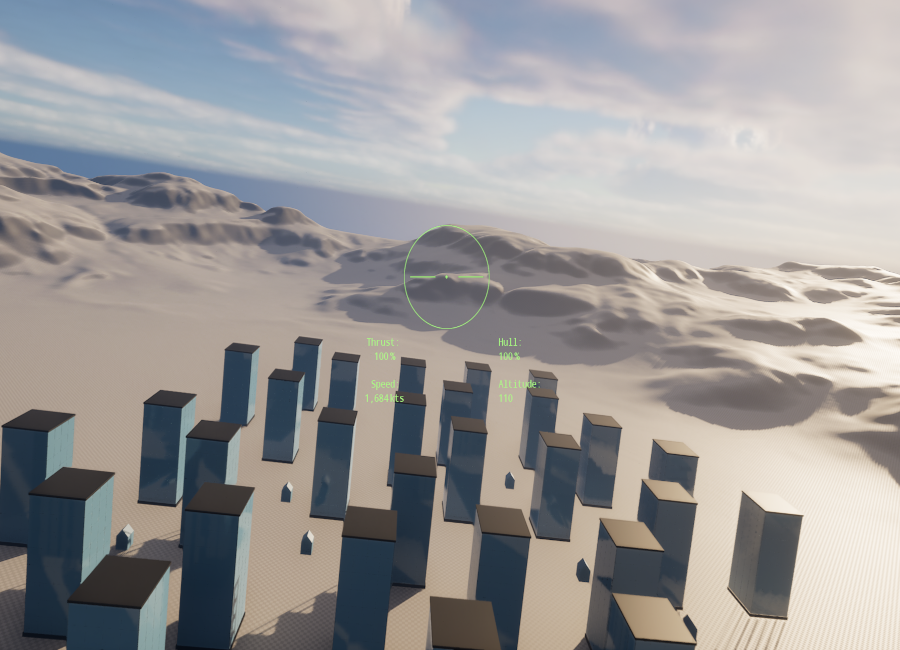
Arcade Flight Sim
Hard on the heels of the VR project came our last project before starting our internships. We had 8 weeks to showcase what we had learnt after a year of studies. How and what to do was left to ourselves to decide. So I decided to keep learning new things in Unreal Engine!
My goals for this project was to create my own character movement (i.e. to not use the Character Movement Component supplied by the engine), to utilize raw input controls, to write a decent AI, and to get the hang of creating UI widgets in code. In the process, I also learnt how to leverage dynamic materials, something I ended up spending more time on than several of my other goals. I was also forced to spend quite a lot of time in finding an internship, a process that I, in all honesty, found harrowing and depressing. If you ever need to fill your ears with the bitter moans of an otherwise enthusiastic programmer, you know how to contact me.
So, a natural fit for my combined goals was a flight simulator! I’ve loved flight sims since playing so many of them on my Amiga 500. I marvelled at the performance of F29 Retaliator which was written entirely in Assembler, captivated by the story and progression in Wing Commander (the Amiga version), and by the gameplay in Knights of the Sky. To temper your expectations straight off the bat, I should add that this ended up being more of a proof of concept than a proper game.

First off, I wrote player movement more or less how I pictured I wanted it. I was going to add raw input at a later stage and figured I’d have to modify the feel then. The code snippet below is the final result, although, as I’d come to realise early in the project, nothing would truly reach a stage where I was wholly satisfied due to the time constraint.
void APilot::StickControls(const FInputActionValue& Value)
{
	const FVector2D InputVector = Value.Get<FVector2D>();
	const float RollValue = InputVector.X * RollRate * RollInputLag;
	CurrentRoll = GetActorRotation().Roll;
	SineRoll = SineD(CurrentRoll);
	if (InputVector.Y < 0.f)
		PitchDownLag = 1.f - FMath::Abs(((1.f - PitchDownCoeff) * SineRoll));
	else
		PitchDownLag = 1.f;
	const float PitchValue = InputVector.Y * PitchRate * PitchDownLag;
	AddActorLocalRotation(FRotator(PitchValue, 0.f, RollValue));

	RollInputLag += 0.01f;
	if (FMath::Abs(InputVector.X) < 0.1f)
		RollInputLag = 0.1f;
	else if (RollInputLag >= 1.f)
		RollInputLag = 1.f;
	else if (RollInputLag >= 0.7f)
		RollInputLag += 0.09f;
	else if (RollInputLag >= 0.4f)
		RollInputLag += 0.04f;
	else if (RollInputLag >= 0.2f)
		RollInputLag += 0.01f;
}

void APilot::StickInputEnd()
{
	RollInputLag = 0.1f;
}
While the RollInputLag code isn’t terrible performance-wise it does still make my eyes water and it was one of those things I was going to fix. The end result provides some wonderful feel to rolling however, so that code was always going to be rewritten after everything else was taken care of.
The thrust was even more simplistic:
void APilot::ThrottleUp(const FInputActionValue& Value)
{
	if (AfterBurning) return;
	TargetThrustRatio += 0.05f;
	if (TargetThrustRatio > 1.f) TargetThrustRatio = 1.f;
	TargetThrust = TargetThrustRatio * MaxThrust;
	CrosshairPtr->UCrosshairWidget::SetThrustValue(FText::AsNumber(TargetThrustRatio * 100));
}
Next, it was time to hook up HOTAS! It all seems fairly straight forward in UE: enable the Raw Input Module and add mapping with modifiers, much like with normal input. And after some initial confusion about how the arrays map to the module (I first thought there was a separate input array for each controller) it just worked! I spent a couple of days fine tuning and then it stopped working. A whole day passed going over every possible setting and trying every conceivable value in every conceivable combination. Another day, frantically searching forums, disabling and re-enabling Raw Input, resetting the usual suspects (Intermediary, Saved, and Binaries). I took another day starting a new project and recreating all my classes and finally, everything worked again!
Until the next day when suddenly nothing worked again. Having been ultra careful not to interfere with anything input related, I was beginning to suspect the problem lay with the engine and so began to look for where input is cached. Fortunately, the first and most obvious place to look proved to be sufficient! Defaultinput.ini contains all settings in plain text, including raw input if you have made any changes from default. Simply deleting the lines referring to raw input and then reimporting the settings in the editor got everything to work again. I made a forum post detailing the steps although have not heard anything since.
https://forums.unrealengine.com/t/raw-input-suddenly-stops/2119230
Now that I had a fix (however the raw input worked at time of Build persists in the Build) I was back on track! The downside was that with spending nearly two weeks finding an internship (I had to write a program as a work sample) and another week debugging raw input, I was now about halfway through the project and had very little to show for it. So I decided to quickly add some destructible buildings before creating enemies. All I needed was a couple of cubes and a decent particle explosion, the latter of which would be repurposed for the enemies anyway!
That’s when I stumbled over dynamic materials. I was immediately struck by how incredibly versatile the system is and decided to shift focus towards learning how to leverage it.
void ADestructibleObjectSimple::RandomizeSettings()
{
	MaterialDissolveAlpha = FMath::RandRange(MinAlpha, MaxAlpha);
	int RotationRate = FMath::RandRange(0, 3);
	DissolveTextureRotation = 0.25f * RotationRate;
}

void ADestructibleObjectSimple::SetDynamicMaterial()
{
	DynamicMaterial = DestructibleMesh->CreateDynamicMaterialInstance(0);
	DynamicMaterial->SetScalarParameterValue(FName("Specular"), Specular);
	DynamicMaterial->SetScalarParameterValue(FName("Roughness"), Roughness);
	DynamicMaterial->SetVectorParameterValue(FName("BaseColour"), BaseColour);
	DynamicMaterial->SetScalarParameterValue(FName("Rotation"), DissolveTextureRotation);
	DynamicMaterial->SetScalarParameterValue(FName("Alpha"), 0.f);
	DestructibleMesh->SetMaterial(0, DynamicMaterial);
}
I started with a simple version that starts by randomizing its “destroyed” state. Basically, I am just dissolving the texture by discarding pixels according to an alpha-mask. When the mesh is hit, I spawn a particle system and adjust visibility.
void ADestructibleObjectSimple::OnHit(Blah blah)
{
	if (bDestroyed) return;

	DynamicMaterial->SetScalarParameterValue(FName("Alpha"), MaterialDissolveAlpha);
	if (ParticleSystem)
		ParticleEffect = UNiagaraFunctionLibrary::SpawnSystemAtLocation(this, ParticleSystem,
			GetActorLocation());
	if (AudioComponent)
		AudioComponent->Play(0.f);
	this->SetActorEnableCollision(false);
	bDestroyed = true;
}
Depending on the target alpha-value, more or less of the texture will be visible. Since I am also randomizing the texture’s rotation, I am able to instantiate quite a few of these without it looking too repetitive, even though I just used the first noise texture I found as alpha mask.

I decided to make a slightly more ambitious variant while at it. No, I mean it, there was no time to get truly fancy with this, so it still looks pretty basic.
void ADestructibleObject::SetDynamicMaterial(int i)
{
	DynamicMaterials[i] = DestructibleWalls[i]->CreateDynamicMaterialInstance(0);
	DynamicMaterials[i]->SetScalarParameterValue(FName("Specular"), Specular);
	DynamicMaterials[i]->SetScalarParameterValue(FName("Roughness"), Roughness);
	DynamicMaterials[i]->SetVectorParameterValue(FName("BaseColour"), BaseColour);
	DynamicMaterials[i]->SetScalarParameterValue(FName("EdgeSize"), EdgeSize);
	DynamicMaterials[i]->SetScalarParameterValue(FName("EdgeIntensity"), EdgeIntensity);
	DynamicMaterials[i]->SetVectorParameterValue(FName("EdgeColour"), EdgeColour);
	if (bDestroyed)
		DynamicMaterials[i]->SetScalarParameterValue(FName("Alpha"), MaterialDissolveAlpha);
	else
	{
		DynamicMaterials[i]->SetTextureParameterValue(FName("DissolveTexture"), DissolveTextures[i]);
		DynamicMaterials[i]->SetScalarParameterValue(FName("Alpha"), 0.f);
	}
	DestructibleWalls[i]->SetMaterial(0, DynamicMaterials[i]);
}
I was going to create an event handler but the prototype tick-version is still there:
void ADestructibleObject::Tick(float DeltaTime)
{
	Super::Tick(DeltaTime);

	if (bCooling && DissolveDelay > 0.f)
	{
		DissolveDelay -= DeltaTime;
	}
	else if (bCooling)
	{
		EdgeIntensity -= DeltaTime * EdgeCoolingRate;
		for (int i = 0; i < 5; i++)
			SetDynamicMaterial(i);
		if (EdgeIntensity < 1)
			bCooling = false;
	}
}

void ADestructibleObject::OnHit(A lot of parameters)
{
	if (bDestroyed) return;

	HitPoints--;
	if (HitPoints <= 0)
	{
		if (ParticleSystem)
		{
			ParticleEffect = UNiagaraFunctionLibrary::SpawnSystemAtLocation(this, ParticleSystem,
				GetActorLocation() + ParticleSpawnOffset);
			ParticleEffect->SetColorParameter(FName("DebrisColour"), BaseColour);
		}
		if (AudioComponent)
			AudioComponent->Play(0.f);
		this->SetActorEnableCollision(false);
		bCooling = true;
		bDestroyed = true;
	}
}
So, the main principle is the same: use particle effect (an explosion with flying debris in this case) to hide the change of alpha. This time I also added edge colour to produce a glowing ember effect that wanes with time.


Writing code is one thing. Implementing it, I find, is more laborious. It took way longer than anticipated to populate the scene with these objects and when it was finally done I had precious little time to start and finish two remaining and crucial issues: enemies and UI. I decided the most important part was enemies and so started writing an AI. I discovered even a simple AI requires a lot of testing and progress was slow. When I finally had something that worked more or less as intended (but still required a LOT of tweaking) I shelved it until later. Of course, meaning I never had the time to finish it.
void AEnemyFlyboy::EvaluateState()
{
	if (CurrentState == EState::S_AvoidCollision) return;
	if (Health <= 5)
		CurrentState = EState::S_Retreating;

	if (TailedByPlayer())
	{
		switch (CurrentState)
		{
			case EState::S_Patrolling:
				if (DistanceToTargetSq(PlayerLocation) < Sq(InterceptDistance))
				{
					CurrentState = EState::S_GainAltitude;
					PingInterval = PingIntervalIntercept;
					GainAltBehaviour();
				}
				else
					PatrolBehaviour();
				break;
			case EState::S_Intercepting:
				if (DistanceToTargetSq(PlayerLocation) > Sq(InterceptDistance))
				{
					CurrentState = EState::S_Patrolling;
					PingInterval = PingIntervalPatrol;
					PatrolBehaviour();
				}
				else if (DistanceToTargetSq(PlayerLocation) < Sq(AttackDistance))
				{
					CurrentState = EState::S_Evading;
					PingInterval = PingIntervalAttack;
					EvasiveBehaviour();
				}
				else
				{
					CurrentState = EState::S_GainAltitude;
					GainAltBehaviour();
				}
				break;
			case EState::S_Attacking:
				if (DistanceToTargetSq(PlayerLocation) > Sq(AttackDistance))
				{
					CurrentState = EState::S_GainAltitude;
					PingInterval = PingIntervalIntercept;
					GainAltBehaviour();
				}
				else
				{
					CurrentState = EState::S_Evading;
					EvasiveBehaviour();
				}
				break;
			case EState::S_GainAltitude:
				if (DistanceToTargetSq(PlayerLocation) > Sq(InterceptDistance))
				{
					CurrentState = EState::S_Patrolling;
					PingInterval = PingIntervalPatrol;
					PatrolBehaviour();
				}
				else if (DistanceToTargetSq(PlayerLocation) < Sq(AttackDistance))
				{
					CurrentState = EState::S_Evading;
					PingInterval = PingIntervalAttack;
					EvasiveBehaviour();
				}
				else
					GainAltBehaviour();
				break;
			case EState::S_Evading:
				if (DistanceToTargetSq(PlayerLocation) > Sq(AttackDistance))
				{
					CurrentState = EState::S_GainAltitude;
					PingInterval = PingIntervalIntercept;
					GainAltBehaviour();
				}
				break;
			case EState::S_Retreating:
				if (DistanceToTargetSq(PlayerLocation) < Sq(AttackDistance))
				{
					CurrentState = EState::S_Evading;
					PingInterval = PingIntervalAttack;
					EvasiveBehaviour();
				}
				else
					RetreatBehaviour();
				break;
			default:
				break;
		}

		// You get the idea...
In UE, there are a lot of finished functions for AI that are obviously far superior to this. The point was to write my own code, however short on time I was. For what it’s worth, I consider this alright if taking into account that it was my first enemy AI and that I only had a week to cobble the whole enemy class together. As it is, the enemy will detect the player when within a certain distance, aim for you and fire, until you get too close at which point the enemy will try to veer away. If damaged to the point that it leaves a smoke trail, it will try to avoid combat altogether.

Last, it was time to add a little UI. There are countless tutorials on creating widgets with BP, of course, but I knew my Blueprint-skills were barely extant by now and so I spent a day learning Slate. That was roughly enough for me to realise I wasn’t going to make it and so I pivoted to creating it in C++ instead. I had two days, frantically learning how to, and then, of course, it took about half an hour to write my two UI-classes.
#pragma once

#include "CoreMinimal.h"
#include "Components/TextBlock.h"
#include "Components/Image.h"
#include "Blueprint/UserWidget.h"
#include "CrosshairWidget.generated.h"


UCLASS(ABSTRACT)
class ARCADEFLIGHTSIM_API UCrosshairWidget : public UUserWidget
{
	GENERATED_BODY()

protected:
	UPROPERTY(BlueprintReadWrite, meta = (BindWidget)) UImage* CrosshairImage;
	UPROPERTY(BlueprintReadWrite, meta = (BindWidget)) UTextBlock* ThrustText;
	UPROPERTY(BlueprintReadWrite, meta = (BindWidget)) UTextBlock* SpeedText;
	UPROPERTY(BlueprintReadWrite, meta = (BindWidget)) UTextBlock* HealthText;
	UPROPERTY(BlueprintReadWrite, meta = (BindWidget)) UTextBlock* AltitudeText;

public:
	void SetThrustValue(FText NewValue);
	void SetSpeedValue(FText NewValue);
	void SetHealthValue(FText NewValue);
	void SetAltitudeValue(FText NewValue);
};

#include "CrosshairWidget.h"
#include <Kismet/GameplayStatics.h>
#include "Engine/World.h"


void UCrosshairWidget::SetThrustValue(FText NewValue)
{
	ThrustText->SetText(NewValue);
}

void UCrosshairWidget::SetSpeedValue(FText NewValue)
{
	SpeedText->SetText(NewValue);
}

void UCrosshairWidget::SetHealthValue(FText NewValue)
{
	HealthText->SetText(NewValue);
}

void UCrosshairWidget::SetAltitudeValue(FText NewValue)
{
	AltitudeText->SetText(NewValue);
}
Of course, the code for a widget is perhaps a tenth of the work required to make it, at least straightforward ones like mine.
No game project plan survives contact with reality. I made far too grandiose plans for this project and came out of it feeling like I had just fallen on my face. It does still look like I got too little done for 8 weeks. Considering I only managed to spend 5 weeks, however, it looks considerably better. At least that’s what I tell myself!

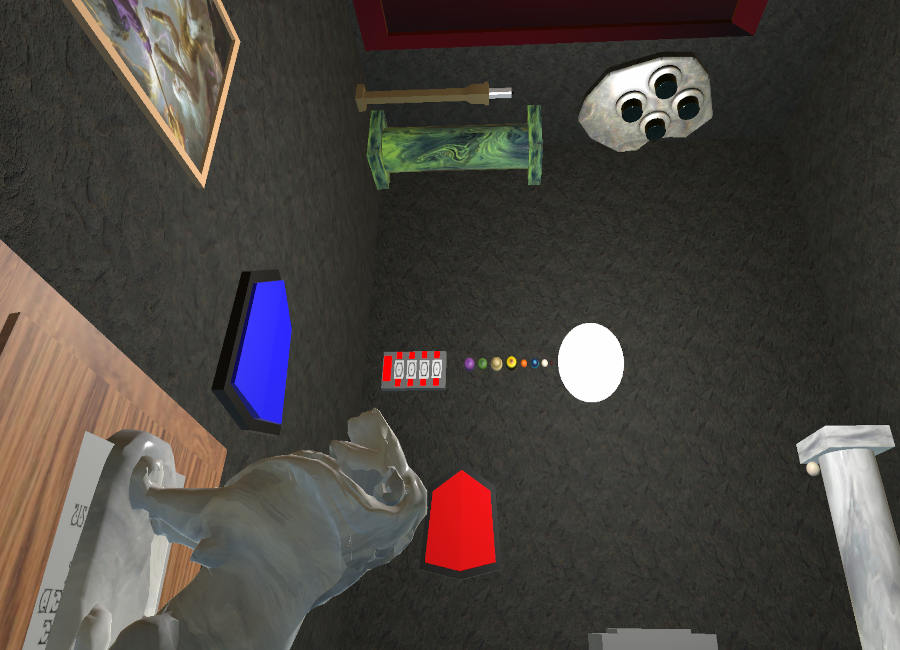
VR Escape Room
After a summer with decidedly less studying than planned, we dove into the next group project, this time with six weeks from start to finish. We were, ostensibly, four programmers and no artists for this project. However, as things panned out, one of our four was ill for most of the time and ended up not contributing at all, whereas another was tied up with looking for investors for a previous project and ended up contributing only a little. Getting to grips with the Meta VR SDK took us at least a week, particularly as we wanted to leverage the hand tracking available in Meta’s SDK. I suffered further with hardware issues that took another week to solve (I did a lot of coding during that week as well, but had no way of testing it in VR). The issue is a previously documented one: Meta’s VR-headsets prefer to look for the integrated GPU on laptops, instead of the proper NVidia or AMD GPU available on gaming laptops, while Windows naturally prefers the larger GPU. The result is that OS and headset don’t communicate with each other. The most commonly found solution to this problem is to change Window’s graphics settings for Unity to use the motherboard GPU for the headset. This did not work for me as I had also set (and then promptly forgotten) my NVidia GPU as default in the NVidia Control Panel. It should be said that the solution to use the integrated GPU is a bad one. The whole point of PCVR is to benefit from the powerful GPU. So, my tip for the day is to tell Windows to use the big GPU, tell NVidia Panel the same (given that this is what you have), and lastly to tell Taskmanager to prioritise OVRServer. This, at least, is what has worked for me.

With those hurdles overcome, I decided to make a super simple puzzle to draw the player in: There are three pedestals in eye catching marble spread across the room. There are also three lion statues in the same three marble colours in various places. It sounds ridiculous but in playtesting we discovered that a lot of players failed at this puzzle. I can only surmise that it is because they are overwhelmed by the VR representation.

The lion puzzle is only roughly 50 lines of code because of how it is structured. The lions are children of the pedestals and so only need to check distance when snapped to them.
public class Lion : MonoBehaviour
{
    public bool inPosition()
    {
        return (Math.Abs(this.gameObject.transform.localPosition.x) < 0.08f &&
                Math.Abs(this.gameObject.transform.localPosition.z) < 0.08f);
    }
}
public class LionPuzzle : MonoBehaviour
{
    private static List<Lion> lions = new List<Lion>();
    public static event Action OnLionPuzzleComplete;

    private void Start()
    {
        foreach (GameObject lion in GameObject.FindGameObjectsWithTag("Lion"))
        {
            lions.Add(lion.GetComponent<Lion>());
        }
    }

    public void LionUpdate() // Function is called whenever a lion is snapped to a pedestal
    {
        if (AllLionsInPlace())
        {
            foreach (Lion lion in lions)
            {
                lion.gameObject.GetComponentInChildren<SnapInteractor>().InjectOptionalTimeOutInteractable(null);
                lion.gameObject.GetComponentInChildren<SnapInteractor>().InjectOptionaTimeOut(0);
                lion.gameObject.GetComponentInChildren<TouchHandGrabInteractable>().enabled = false;
                lion.gameObject.GetComponentInChildren<Grabbable>().enabled = false;
                lion.gameObject.GetComponent<Rigidbody>().isKinematic = true;
            }
            OnLionPuzzleComplete?.Invoke();
        }
    }

    private static bool AllLionsInPlace()
    {
        foreach(Lion lion in lions)
        {
            if (!lion.inPosition()) return false;
        }
        return true;
    }
}
Since we were without artists, we made very simple assets, either cobbling primitives together in Unity or in Blender. The lion’s, however, is a free asset by AK Studio Art called “Sitting Lion Statue”. Even using free assets off the internet created work, however, as colliders must be less than a few hundred triangles for hand tracking to work. Simplifying the geometry of a mesh was time consuming.


Next up was a puzzle in the shape of a safe with a combination lock. Again, this required very little code. I wanted a system that could handle any number of button presses before accepting the correct combination, which led me to simply advance the sequence if the last pressed button was the correct one at that point in the sequence.
public void ButtonPress(int keyNumber)
{
    if (boxOpen) return;
    if (keyNumber == correctSequence[sequenceNumber])
    {
        if (sequenceNumber == correctSequence.Length - 1)
        {
            StartCoroutine(UnBoxing());
            boxOpen = true;
            LockBoxOpen?.Invoke();
        }
        else sequenceNumber++;
    }
    else sequenceNumber = 0;
}

Naturally, the escape room is littered with clues. One of the other programmers made a shader that shows an otherwise invisible layer and so, armed with a crystal ball, the player can look at various objects and see things that were not otherwise there. So I grabbed a painting of Herschel and added a planet for him to look at

although when viewed through the crystal ball, the player sees a clue instead:

This, of course, serves as a clue as to what my final and biggest puzzle for the project was: a planetarium. Only the player needs to find all the planets, put them in order, and enter the correct year in the control box.

Since the planets have two very different jobs to perform in this puzzle, I decided to exercise a little sleight of hand: the planets are already in place from start but not rendering. The various spheres picked up and put in place are just keys that if put in the same sequence, destroy themselves and unveil the real planets. While the code for this is significantly more costly than that for the lions (each snapping point must still accept any key, or the player will know it wasn’t the correct one, meaning I am checking against ALL keys every time one is snapped in place), it becomes much simpler and, crucially, since the code is only executed on input from the player the cost is (mostly) irrelevant.
public void AddedPlanet()   // Function is called when a key is snapped to an orbit
{
    foreach (GameObject orbiter in orbiters)
    {
        if (Math.Abs(orbiter.transform.position.x - this.gameObject.transform.GetChild(0).position.x) < marginOfError
            && Math.Abs(orbiter.transform.position.z - this.gameObject.transform.GetChild(0).position.z) < marginOfError
            && orbiter.gameObject.name == planetName)
                inPosition = true;
    }
    PlanetAdded?.Invoke();
}

public void RemovedPlanet() // Function is called when a key is removed from an orbit
{
    inPosition = false;
}
Another feature was that I could have slightly different sizes for the keys and real planets which made debugging easier as there was a visual cue to the keys destroying themselves and the planets being revealed (look at Mars, furthest to the left).

To simplify things, the planetarium won’t start at the press of the start button until the planets are revealed. I also decided to make it so that it always takes the same time to rotate to the input year, meaning it rotates a lot faster if traversing a thousand years than ten.

private IEnumerator MovePlanets(int setYear)
{
    orreryRunning = true;
    int iterations = 0;
    while (iterations != _targetTime)
    {
        foreach(OrreryPlanet planet in planets)
        {
            planet.transform.Rotate(0f, planet.rotationRate() * _deltaYears / _targetTime, 0f, Space.Self);
        }
        iterations++;
        if (iterations == _targetTime)
            _currentYear = setYear;

        yield return new WaitForSeconds(0.01f);
    }
    orreryRunning = false;
    if (_currentYear == _targetYear)
        OnOrreryFinished?.Invoke();
}
And that was mostly it. A lot of time was spent making assets (even though they were all simple) and choosing textures. Sound design was pretty non-existent for this project but there is one for when the room rotates and one on completion of a puzzle. Even though manpower was virtually halved, solid planning and excellent cooperation between the two of us that remained meant we managed to get the project finished on time with hardly any crunch.

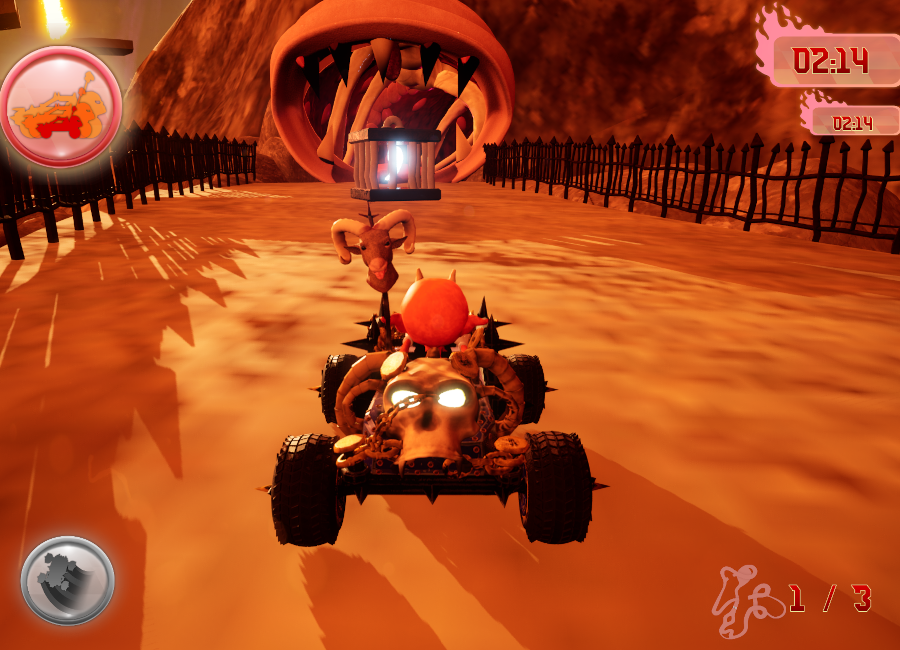
3D single player kart racing
This was our second group project which started immediatly after our solo 3D projects and lasted 8 weeks. This time, we were four programmers and four artists and I somehow managed to trick all the others into creating this game in C++, even though the others had even less experience than I did. The artists hadn’t even been in Unreal before. At any rate, I wanted to try something besides logic this time and so opted for particle FX, obstacles and sound. But I wanted to control them with C++! Having had but a brief encounter with Niagara in the previous project, I started by just learning how to make more advanced FX. In the process I created a burning hoop for the player to jump through (someone had suggested this)

which is probably the most complicated visual effect I made for this game due to the material controlling the centre of the ring looking like this:

However, besides a collision box that registers when the player drives through the ring, there was no code necessary. A much simpler effect that required at least some programming was one of the obstacles in the game: fire geysers!

Since you can see where the flames erupt, I wanted to at least add some randomness to their behaviour.
if (bRandomised)
{
	TimeActive = FMath::RandRange(1.f, 5.f);
	TimeInactive = FMath::RandRange(3.f, 10.f);
	StartDelay = FMath::RandRange(0.f, 5.f);
}
else
{
	if (TimeActive < 1.f) TimeActive = 1.f;
	if (TimeInactive < 3.f) TimeInactive = 3.f;
}
void AFlameObstacle::Tick(float DeltaTime)
{
	Super::Tick(DeltaTime);

	if (StartDelay > 0.f)
	{
		StartDelay -= DeltaTime;
		return;
	}

	if (bActive)
	{
		ActiveTimer += DeltaTime;
		if (ActiveTimer >= TimeActive)
		{
			DeactivateSystem();
		}
	}
	else if (!bActive)
	{
		InactiveTimer += DeltaTime;
		if (InactiveTimer >= TimeInactive)
		{
			ActivateSystem();
		}
	}

	if (bCleanup)
	{
		ActiveTimer += DeltaTime;
		if (ActiveTimer >= TimeActive + 2.8f)
		{
			FlameObstacleEffect->DestroyComponent();
			FlameObstacleEffect = nullptr;
			bCleanup = false;
		}
	}
}
Another simple obstacle were large swinging axes over a bridge

their movement controlled thus:
float AAxeAttack::GetSwingSpeed()
{
	float CurrentRotation = GetActorRotation().Pitch;
	if (FMath::Abs(CurrentRotation) >= SwingDistance && SwingTimer >= 0.2f)
	{
		Swing = -Swing;
		SwingTimer = 0.f;
		AxeAudio->FadeIn(0.3f);
	}
	SwingInertia = FMath::Cos(FMath::DegreesToRadians(GetActorRotation().Pitch));
	return (Swing * SwingSpeed * SwingInertia);
}

void AAxeAttack::Rotate(float DeltaTime)
{
	AddActorLocalRotation(SwingRotation * GetSwingSpeed() * DeltaTime);
}
Out of all the systems I created during this project, these axes were the one that kept haunting me with strange behaviour. Since I swing them with cosine, they stop if they ever get to 90°, which is why I always made sure to set swingdistance to less than 90. Regardless of this, not only would they intermittently get stuck, they would frequently start at 180° and so swing at potential birds above the bridge like hellish windscreen wipers. Trying to set start rotation in BeginPlay did nothing, nor did setting it in the constructor. I still don’t understand this but I am guessing something happens when they are off camera and not being rendered. In the end, I had to solve it by checking rotation in Tick and re-initialise them if they went above 90°.
The obstacle that was most complicated to write code for was the trident attack.

This was because I realised it would be hopeless to place them in the level except for where they are supposed to strike the ground and I needed to time this with when the player is close but also to give the player fair warning. So I ended up making a spawner as well as the system itself where the system is actually both a warning system and the tridentsystem. Initially, I made the spawner calculate a distance ahead along the players forward vector but even though we designed the level to be fairly straight there, this became too chaotic and so I simply added a random distance to a manually placed location for each trident.
if (ACharacterInput* Driver = Cast<ACharacterInput>(OtherActor))
{
	if (bSetSpawnManually)
	{
		float RandomX = FMath::RandRange(-ManualRangeX, ManualRangeX);
		float RandomY = FMath::RandRange(-ManualRangeY, ManualRangeY);
		SpawnPosition = FVector(ManualLocation.X + RandomX, ManualLocation.Y + RandomY, ManualLocation.Z);
	}
	else
	{
		FVector DriverLocation = Driver->GetActorLocation();
		FVector DriverVector = Driver->GetActorForwardVector();
		SpawnPosition = DriverLocation + SpawnDistance * DriverVector;
		SpawnPosition.Z += TridentHeightAdjust;
		SpawnPosition.X += TridentXAdjust;
		SpawnPosition.Y += TridentYAdjust;
	}
	SpawnTridentAttack(SpawnPosition);
}
The spawned system begins with the warning effect and starts a timer for spawning the trident. It is a bit crude and a couple of weeks later I learnt how to make timed events in unreal but never had the time to update this code.
void ATridentAttack::BeginPlay()
{
	Super::BeginPlay();
	TargetComponent->OnComponentBeginOverlap.AddDynamic(this, &ATridentAttack::OnCapsuleBeginOverlap);
	SystemLocation = GetActorLocation();
	SystemRotation = GetActorRotation();
	AActor* ActorRef = GetWorld()->GetFirstPlayerController()->GetPawn();
	CarDriver = Cast<ACharacterInput>(ActorRef);
	MovementVector = -FVector(	FMath::Sin(FMath::DegreesToRadians(SystemRotation.Yaw)) * FMath::Sin(FMath::DegreesToRadians(SystemRotation.Roll)),
		FMath::Cos(FMath::DegreesToRadians(SystemRotation.Yaw)) * FMath::Sin(FMath::DegreesToRadians(SystemRotation.Roll)),
		FMath::Cos(FMath::DegreesToRadians(SystemRotation.Roll)));
	TridentLocation = SystemLocation - (TridentOffsetDistance * MovementVector);
	ImpactTime = (TridentOffsetDistance / (ProjectileSpeed * NiagaraVelocityScale.Z)) - 0.05f;
	WarningAudio->SetSound(WarningSound);
	TridentAudio->SetSound(FlyingSound);
	FireAudio->SetSound(BurningSound);
	ImpactAudio->SetSound(ImpactSound);

	SpawnWarning();
}

void ATridentAttack::Tick(float DeltaTime)
{
	Super::Tick(DeltaTime);

	if (bAttackInitialising)
	{
		WarningTimer += DeltaTime;
		if (WarningTimer >= WarningTime)
		{
			SpawnProjectile();
			WarningAudio->Stop();
			bAttackStarted = true;
			bAttackInitialising = false;
			WarningTimer = 0.f;
		}
	}
	else if (bAttackStarted)
	{
		AttackTimer += DeltaTime;
		if (AttackTimer >= 9.f - WarningTime)
		{
			bAttackActive = false;
			bAttackStarted = false;
			AttackTimer = 0.f;
			DeactivateAndDestroy();
		}
		else if (AttackTimer >= ImpactTime && !bImpact)
		{
			bImpact = true;
			TridentAudio->Stop();
			ImpactAudio->Play();
			bAttackActive = true;
			CarDriver->StartScreenShake(1, 0.5f);
		}
	}
}
The trident itself is spawned a set distance above the system’s location (the MovementVector * TridentOffsetDistance in the codeblock above). Since the smoketrail needs to change behaviour post impact, I am setting its variables here and let Niagara lerp between the two positions:
void ATridentAttack::SpawnProjectile()
{
	FRotator EffectRotation = FRotator(SystemRotation.Pitch, -SystemRotation.Yaw, SystemRotation.Roll);
	TridentEffect = UNiagaraFunctionLibrary::SpawnSystemAtLocation(this, Trident, TridentLocation, EffectRotation, FVector(1.f), true, true);
	FVector ProjectileVector = MovementVector * NiagaraVelocityScale;
	FVector SmokeOffsetFlying = MovementVector * -100.f;
	TridentEffect->SetNiagaraVariableVec3(FString("TridentVelocity"), ProjectileVector);
	TridentEffect->SetNiagaraVariableFloat(FString("TridentSpeed"), ProjectileSpeed);
	TridentEffect->SetNiagaraVariableVec3(FString("SmokeOffset"), SmokeOffsetFlying);
	TridentEffect->SetNiagaraVariableVec3(FString("SmokeOffsetStanding"), FVector(0.f, 0.f, 100.f));
	TridentAudio->Play();
	FireAudio->Play();
}
Another particle effect I want to mention is the tire particles:

While most of the track is supposed to be sand or rock, the tunnel is organic. So I made two types of tire particles. Initially, I had planned on raycasting to find what material was used below the kart but one of the artists made a single material for the entire circuit, so this was not possible. Instead, I opted to go with a trigger box around the tunnel. Again, quite crude but under the circumstances it was the simplest solution I could think of. I was lucky the tunnel was off to the side enough for a single box to cover its entirety. There are also a number of jumps and places where the kart can fall off the track during which time the kart is airborne and should not produce any particles.
void ACharacterInput::WheelParticlesGo(bool bParticleSpeed)
{
	if (bAirborne)
	{
		if (TireEffect)
		{
			WheelParticlesDeactivate();
			bParticleSpeedOld = false;
		}
		AnimInstance->isFalling = true;
		return;
	}
	else
	{
		AnimInstance->isFalling = false;
	}
	if (bParticleSpeed == bParticleSpeedOld && bTunnel == bTunnelOld) return;
	else if (!bTunnel) TireSystem = DustSystem;
	else if (bTunnel) TireSystem = BloodSplatterSystem;
	if (bTunnel != bTunnelOld && TireEffect) WheelParticlesDeactivate();

	if (bParticleSpeed)
	{
		TireEffect = UNiagaraFunctionLibrary::SpawnSystemAttached(TireSystem, CarMesh, NAME_None, FVector(-75.f, -50.f, 5.f), FRotator(0.F),
			EAttachLocation::SnapToTargetIncludingScale, true, true);
		TireEffect2 = UNiagaraFunctionLibrary::SpawnSystemAttached(TireSystem, CarMesh, NAME_None, FVector(-75.f, 50.f, 5.f), FRotator(0.F),
			EAttachLocation::SnapToTargetIncludingScale, true, true);
	}
	else if (TireEffect) WheelParticlesDeactivate();

	bTunnelOld = bTunnel;
	bParticleSpeedOld = bParticleSpeed;
}
I also did music and sounds for the game. A lot of time was spent trying to find fitting sounds and in the end two of the artists had to help me hunt more of them down. There was also a lot of mixing and cutting of sounds. Then I spent a couple of days getting to grips with metasounds only to discover there is no (documented) way to control them through C++. (I looked through a tutorial series on how to control Metasounds through C++ several times but the series creator is actually injecting variables with C++ and controlling the sounds with blueprints). So, I pivoted to Soundcues. After working with them for a while I realised that almost everything you can do with Metasounds (that I wanted to do) can be done in C++ anyway. My engine sound looked like this:

and is controlled like this:
void ACharacterInput::EngineNoise(float DeltaTime)
{
	if (bTurboCharging)
	{
		if (rpm > AnimInstance->CarSpeed) rpm = AnimInstance->CarSpeed;
		if (AnimInstance->CarSpeed - rpm > 100.f)
		{
			rpm = FMath::Lerp(Postrpm, AnimInstance->CarSpeed, (RevUpTime / 0.2f));
			RevUpTime += DeltaTime;
		}
		else
		{
			rpm = AnimInstance->CarSpeed;
			Prerpm = rpm;
			RevDownTime = 0.f;
		}
		if (AcceleratingValue > 0.8f)
		{
			if (TurboPitch < 4.f) TurboPitch += DeltaTime;
			else bTurboCharged = true;
			TurboCharge = TurboPitch;
		}
	}
	else
	{
		if (rpm > 0.f)	rpm = FMath::Lerp(Prerpm, 0.f, (RevDownTime / (Prerpm / 2000.f)));
		TurboPitch = FMath::Lerp(TurboCharge, 0.f, RevDownTime / 0.5f);
		Postrpm = rpm;
		RevDownTime += DeltaTime;
		RevUpTime = 0.f;
		if (bTurboCharged)
		{
			TurboRelease->Play();
			TurboCharge = 0.f;
			bTurboCharged = false;
		}
	}

	if (rpm > 500.f)
	{
		Crossfader = (rpm - 500.f) / 1000.f;
	}
	else if (rpm < 500.f) Crossfader = 0.f;
	EngineAudio->SetFloatParameter("EnginePitch", rpm);
	EngineAudio->SetFloatParameter("TurboPitch", TurboPitch);
	EngineAudio->SetFloatParameter("EngineCrossfade", Crossfader);
}
Part of the complexity arises from the fact that a Soundcue can only double the pitch of a sample, whereas the pitch of an engine should increase more. If I understand correctly, Metasounds can increase the pitch far more, so that would certainly have simplified things. Another complication was that I wanted the car to rev down slower than the speed because it just didn’t sound natural to me otherwise. In retrospect I was probably wrong but the change I brought this way was fairly small and at the time I thought it sounded a lot better. I should probably add that the turbo release sound is on a different cue. I tried putting them all together in the same soundcue but for some reason it refused to work. I mentioned earlier that I learnt to make timed events. I used them for the music player. Realising that it can get a bit tiresome with just the one song to keep you company on endless playthroughs, I made a system that would play a random song from a list every time the last song ended.

void ACharacterInput::MusicPlayerStart()
{
	if (MusicPlayerAudio)
	{
		if (MusicPlayerAudio->IsPlaying()) MusicPlayerAudio->Stop();
		int Rand = FMath::RandRange(0, 6);
		MusicPlayerAudio->SetIntParameter("SongNumber", Rand);
		switch (Rand)
		{
		case 0: CurrentClip = Clip00;
			break;
		case 1: CurrentClip = Clip01;
			break;
		case 2: CurrentClip = Clip02;
			break;
		case 3: CurrentClip = Clip03;
			break;
		case 4: CurrentClip = Clip04;
			break;
		case 5: CurrentClip = Clip05;
			break;
		case 6: CurrentClip = Clip06;
			break;
		default:
			MusicPlayerAudio->Stop();
			CurrentClip = 3600.f;
			break;
		}
		GetWorldTimerManager().ClearTimer(MusicHandle);
		GetWorldTimerManager().SetTimer(MusicHandle, FTimerDelegate::CreateLambda([this]()
			{
				MusicPlayerStart();
			}), CurrentClip, false);
		MusicPlayerAudio->Play();

	}
}
This actually worked smashingly, until you finish your three laps and the level is reloaded. Even though I made sure to clear the timer, stop the music and remove all pointers, the music would crash the game. At the time I supposed it had something to do with sound being persistent in Unreal and at this point I was frantically fixing bugs minutes before the presentation. So I commented the player out and the game suffers from having just the one song during play.
And on that note (hah!) I finish displaying my input in this game. It is available for download:
https://yrgo-game-creator.itch.io/hellracer
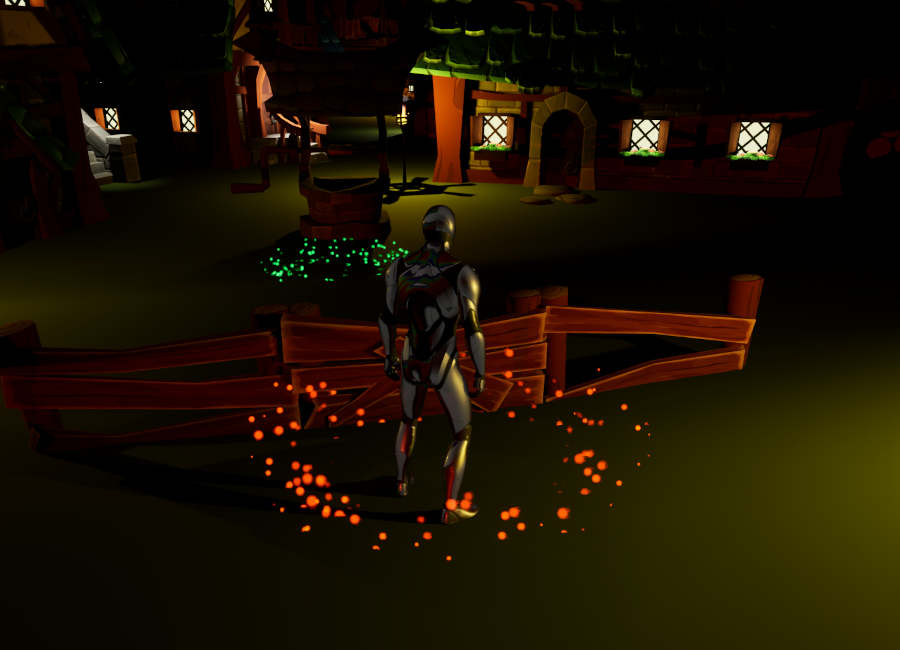
3D platformer
We got two weeks of lectures and preparations on Unreal Engine, including two days on Blueprints. After that it was time to create another four week solo game, this time in 3D! I decided to make as simple a game as possible because I planned to learn C++ to make the game. Jumpbot is what I’d call a 3D version of Jump King without actually having played Jump King (I was going to but never felt like there was time). So, four weeks isn’t actually a lot of time but aside from the game not actually having an end, I am mostly pleased with the result. Holding the jump button charges your jump power and starts a particle effect that changes colour every second to work as a gauge for how long the player is pressing.

When it gets to purple, you’ve reached max charge. Using the third person template there was really little I needed to add to the code, which was a good thing. I quickly realised that I was not learning C++ but rather learning Unreal and while the documentation is fine for someone already familiar with programming in Unreal, almost all tutorials and examples online are using blueprints. My jump behaviour is summed up in two short functions:
void APlayerCharacter::JumpCharge(const FInputActionValue& Value)
{
	if (bJumping || bFalling) return;
	bJumpCharging = Value.Get<bool>();

	if (JumpChargeSystem && !JumpChargeEffect)
			JumpChargeEffect = UNiagaraFunctionLibrary::SpawnSystemAttached(JumpChargeSystem, GetMesh(), "spine_05", JumpChargeEffectOffset,
				FRotator::ZeroRotator, EAttachLocation::KeepRelativeOffset, true, true, ENCPoolMethod::None, true);

	JumpChargeValue += FApp::GetDeltaTime();

	if (JumpChargeValue >= 10.f)
	{
		JumpChargeEffect = nullptr;
		JumpChargeValue = 0;
	}
}

void APlayerCharacter::JumpRelease(const FInputActionValue& Value)
{
	if (JumpChargeEffect)
	{
		JumpChargeEffect->DestroyComponent();
		JumpChargeEffect = nullptr;
	}

	if (JumpChargeValue > JumpChargeTime) JumpChargeValue = JumpChargeTime;
	bJumpCharging = false;
	bJumping = true;

	FVector Forward = GetActorForwardVector();
	FVector Upward = FVector(0, 0, 1);
	float ForwardImpulse = JumpChargeValue * JumpForceDefault * JumpForwardRatio;
	float UpwardImpulse = JumpChargeValue * JumpForceDefault;
	LaunchCharacter(Forward * ForwardImpulse + Upward * UpwardImpulse, true, true);
	JumpChargeValue = 0;
}
Weirdly, that is practically the entire game! I coded some moving platforms as well with different kinds of behaviours that could be set in the details panel and the animinstance as well, in which I am actually tweaking character friction on landing. Obviously, I also made the particle system and changed the jump animation and since I thought I had the time I added inverse kinematics. Other than that, it was down to building a level, and that of course took a lot of time. I spent two and a half weeks just trying to learn how to write working code for unreal though.
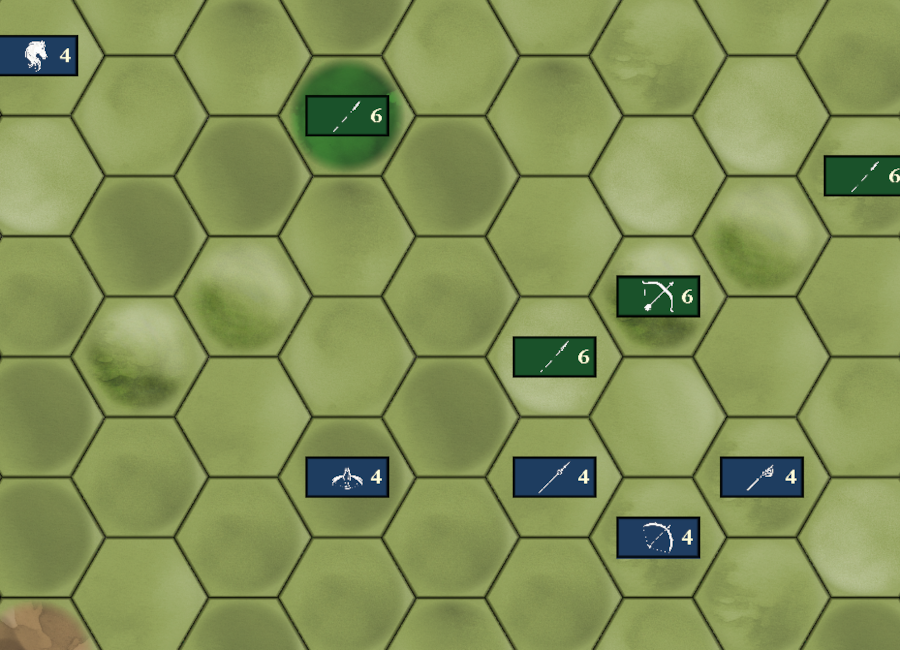
2D Turn based hexagonal strategy
Not long after our first project was finished, we dove into our first solo-projects. Four weeks to create a mobile game in Unity using Firebase as an online data storage. Since we could no longer rely on artists to create graphics, the games we produced were significantly less appealing to the eye. But since I can be incredibly stupid (yes, you can quote me on that) I spent nearly two whole weeks making graphics. Confession: I have never played mobile games. But I wanted to make a strategy boardgame with hexagonal tiles where two armies meet, so first off I made a weighted random map generator. Weighted in the sense that I didn’t want lots of impassable mountains in the middle of the board and not so many hills there either.

for (int col = 0; col < mapSizeWidth; col++)
{
    for (int row = 0; row < mapSizeHeight; row++)
    {
        _tilePosYOffset = (-0.5f + (1 + _tilePosYIncrement) / 2) * (col % 2);

        random = Random.Range(0, 100);
        random += (Mathf.Abs(col - (mapSizeWidth / 2)) - (mapSizeWidth / 2)) * 2;
        random += (Mathf.Abs(row - (mapSizeHeight / 2)) - (mapSizeHeight / 2)) * 2;

        switch (random)
        {
            case < 58:
                random = Random.Range(0, 8);
                break;
            case < 65:
                random = Random.Range(0, 4) + 8;
                break;
            case < 80:
                random = Random.Range(0, 4) + 12;
                break;
            case > 79:
                random = Random.Range(0, 4) + 16;
                break;
            default:
                random = Random.Range(0, 8);
                break;
        }

        mapSave[(col * mapSizeHeight) + row] = random;
        GameObject tilePrefabCopy = Instantiate(tilePrefabs[random], new Vector3(col * _tilePosXIncrement,
            (row * _tilePosYIncrement) + _tilePosYOffset, 0), Quaternion.identity);
        tilePrefabCopy.GetComponent<TileScript>().pos = ((col + 1) * 100) + (row + 1);
    }
}
Thinking it would facilitate saving data online, I also decided to save the entire gamestate in one int[]. Having each tile perform a raycast to extract the relevant data from possible units seemed like the easiest and most efficient way. I also decided to keep the comments as a reference should need arise to tinker with the save function later.
for (int i = 0; i < mapSize; i++)
{
    mapSave[i] = mapSave[i] % 100;
    RaycastHit2D unitCheck = Physics2D.Raycast(TileScript.tiles[i].gameObject.transform.position, new Vector2(0, 0), 0, UNITSLAYER);

    if (unitCheck.collider != null)
    {
        Unit unit = unitCheck.collider.GetComponent<Unit>();

        mapSave[i] += ((int)unit.type + ((int)unit.nationality * (int)Enum.GetValues(typeof(Regiment)).Length)) * 100;
        mapSave[i] += unit.unitStrength * 10000;
        mapSave[i] += unit.move * 100000;
        mapSave[i] += BattlefieldMovement.turn * 1000000;

        //             turn   mov   str   unit  tile
        // mapSave[i] = 15     1     3     22    12
        //              *1m   *100k *10k  *100   *1
    }

    PlayerPrefs.SetInt(i.ToString(), mapSave[i]);
}
fire.FireSave();
Since UI and input are a bit limited on a mobile, I pretty much used Unity’s built in OnMouseDown() event for all game input. Each tile and each unit contains this event and when pressed, they refer to the main game script.
public void MouseClicked()
{
    if (currentUnit == null) FindUnit();
    else if (currentUnit.mode == Unit.Mode.Move)
    {
        target = Camera.main.ScreenToWorldPoint(Input.mousePosition);
        RaycastHit2D unitCheck = Physics2D.Raycast(target, Vector2.zero, Mathf.Infinity, unitLayerMask);
        if (unitCheck.collider == null) MoveUnit();
        else
        {
            newUnit = unitCheck.collider.gameObject.GetComponent<Unit>();
            if (newUnit == currentUnit) ChangeMode(currentUnit.mode);
            else ChangeUnit();
        }
    }
    else if (currentUnit.mode == Unit.Mode.Melee)
    {
        AttackInit();
        if (newUnit == null) return;
        if (newUnit.nationality != currentUnit.nationality) Melee(currentUnit.pos / 100);
    }
    else if (currentUnit.mode == Unit.Mode.Ranged)
    {
        AttackInit();
        if (newUnit == null) return;
        if (newUnit.nationality != currentUnit.nationality) RangedAttack();
    }
}
Realising that this type of game relies on input for visual updates, I also decided to do away with Unity’s Update function and instead put all unit movement in co-routines.

private IEnumerator KillingUnit()
{
    while (_coroutineIsRunning) yield return null;
    _coroutineIsRunning = true;

    dyingSprite = dyingUnit.GetComponent<SpriteRenderer>();
    dyingUnit.FindCurrentTile();
    Debug.Log("Battle took place on " + currentTile.pos);
    dyingColor = dyingSprite.color;
    float r = dyingColor.r;
    float g = dyingColor.g;
    float b = dyingColor.b;
    float a = 1;
    if (dyingUnit.selected) Deselect(dyingUnit);

    while (r + g + b > 0)
    {
        dyingSprite.color = dyingColor;
        if (r > 0) r -= colorChangeRate;
        if (g > 0) g -= colorChangeRate;
        if (b > 0) b -= colorChangeRate;
        dyingColor = new Color(r, g, b, a);
        yield return new WaitForFixedUpdate();
    }
    dyingUnit.transform.GetChild(0).gameObject.SetActive(false);
    SceneLoader.infoText.text = dyingUnit.name + " defeated.";
    while (a > 0)
    {
        dyingSprite.color = dyingColor;
        dyingColor = new Color(r, g, b, a -= colorChangeRate);
        yield return new WaitForFixedUpdate();
    }

    dyingUnit.gameObject.SetActive(false);
    Unit.units.Remove(dyingUnit);
    _coroutineIsRunning = false;
    if (_meleeCombat)
    {
        StartCoroutine(MovingOneUnit(currentUnit, currentTile.transform.position));
    }
}
There was a lot of firsts for me in this project and the severe time constraint made worse by my fumbling with graphics meant I pushed myself pretty hard on this one. It also meant I never had time to balance the game.
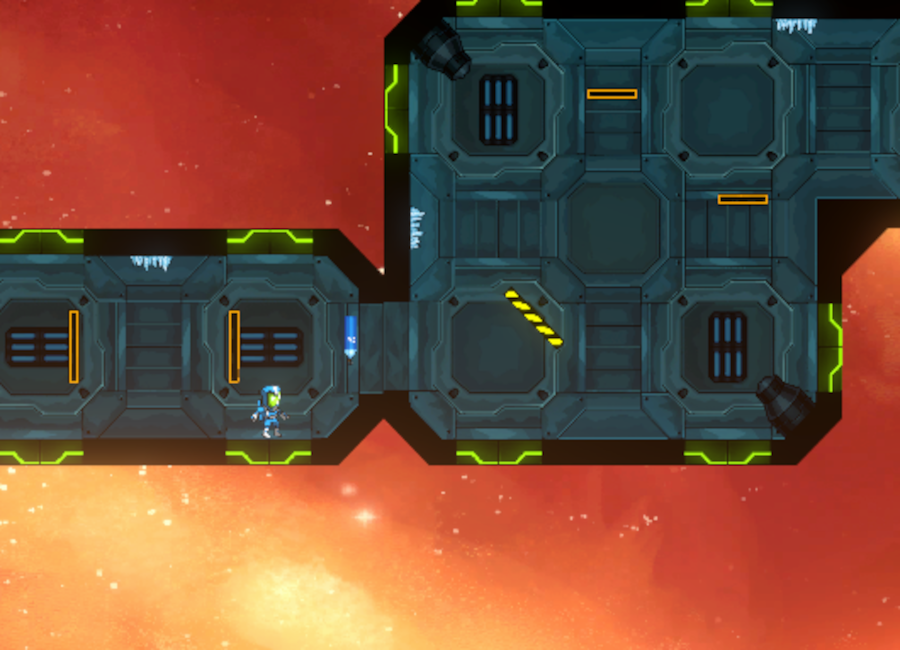
2D asymmetrical couch co-op platformer.
This was my first real school project, after only three months of getting to know Unity and C#. Three programmers teamed up with three artists for 7 weeks of furious development. One player controls the little astronaut, the other player moves the modules around to create a path for the first player. The astronaut has an oxygen gauge that runs down, inciting the players to hurry. There are also a number of deadly traps strewn across the modules for the astronaut to avoid. Upon death, the astronaut is simply returned to the start of the level but the modules remain in place. Every new level, the roles are interchanged.

Initially, I was only supposed to do character movement, which in itself is often a large post and in this case made more complicated by the fact that gravity can be turned off which changes movement dramatically. In any case, the other team members had requested Celeste-like movement (without double jumping or dashes) which I obviously couldn’t manage due to inexperience and the time restraint. But I did want to lower gravity near the apex of the jump to make it feel nicer and after experimenting with various solutions I came up with this:
if (_jumpTimer > jumpForce / (normalGravity * 9.81f) * (1 - apexRatio)) ChangeGravity(jumpApexGravity);
I also wanted the astronaut to stick to surfaces while in zero-G. Something like:

so I resorted to a raytrace downwards that returns the normal of surfaces fairly close and rotating the astronaut to the closest increment of 45°.
    void AlignWithGround()
    {
        if (gravity) return;
        RaycastHit2D hitLeft = Physics2D.Raycast(rayLeft.position, -transform.up, rayLength, _layerMask);
        RaycastHit2D hitRight = Physics2D.Raycast(rayRight.position, -transform.up, rayLength, _layerMask);
        RaycastHit2D hitCentre = Physics2D.Raycast(rayCentre.position, -transform.up, rayLength, _layerMask);
        if (hitLeft.collider == null && hitRight.collider == null) return;

        _correctZ = Mathf.RoundToInt(Vector2.SignedAngle(Vector2.up, (hitLeft.normal + hitRight.normal + hitCentre.normal)/3));
        _correctZ /= 45;
        _correctZ *= 45;

        if (body.rotation != _correctZ && jumping && _jumpTimer > 0.5f || body.rotation != _correctZ && !jumping)
        {
            RotateZ(_correctZ);
        }
    }
and applied relative force:
if (groundedLeft && groundedRight) body.AddRelativeForce(magBootForce * Vector2.down, ForceMode2D.Force);
To make controlling the astronaut intuitive while running up walls, I also added a change in input
    if (gravity || !gravity && grounded && !horizontal) _targetSpeed = moveInput.x * _speed;
    else if (!gravity && grounded && horizontal) _targetSpeed = -moveInput.y * _speed;
I should also add that I decided to flip (rotate 180°) the astronaut when jumping in zero-G, figuring this would lead to less complexity in movement.

I briefly toyed with the idea of allowing the player to rotate the non-grounded astronaut at whim but I still haven’t made my mind up on that and time was running awfully short because one of the other programmers had an exam to study for, then got sick, then his kids got sick in succession and then he was mandated to spend Christmas and New Year with his family and so it was mostly up to just two of us the create the game. So, I also got inputs and module behaviour, made all animations out of the supplied spritesheets and the animator, code for lethal traps and the oxygen system.
The other programmer who was not sick had made a grid for the modules to adhere to as well as defined the layers and composition of the actual modules and had written a start for module movement when we reshuffled responsibilities as a result of being fewer than we had assumed to be. Taking over someone else’s script for the first time was interesting and is a bit special in a school project where it would be hugely unfair to rewrite someone else’s code as everyone needs to be able to show their contributions. As it was, I tested a lot of different designs but had to settle for something that is less elegant but produced far fewer bugs: modules can never overlap.
Making the modules hatches was a fun challenge! When two modules dock next to each other, their hatches need to open and when either module is later moved, both hatches need to close.

    void CheckForOtherHatch()
    {
        RaycastHit2D hatchCheck = Physics2D.Raycast(checkForOtherHatch.position, Vector2.zero, Mathf.Infinity, HATCHLAYER);
        _otherHatchPresent = hatchCheck.collider;
        if (_otherHatchPresent && hatchCheck.collider != coll)
        {
            other = hatchCheck.collider.gameObject.GetComponent<Hatches>();

            if (other != null)          // red hatches can return null
            {
                OpenHatch();

                if (other.module.floating) return;
                else
                {
                    other.OpenHatch();
                    other.other = this;
                }
            }
        }
    }
public void CloseHatch()
    {
        if (coll.enabled == false) coll.enabled = true;
        openedHatch = false;
        spriteRenderer.enabled = true;

        if (other != null)
        {
            if (other.other != null) other.other = null;
            other.CloseHatch();
            other = null;
        }
        audioSource.clip = hClose;
        audioSource.Play();
        animator.Play("CloseHatch");
    }
The game is available to download: https://yrgo-game-creator.itch.io/2-the-pods